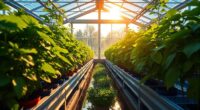
If you’re looking for budget-friendly greenhouse ideas, I’ve got you covered! An 8×12 ft portable walk-in greenhouse is perfect for outdoors. Contemplate building your own for a fun DIY project. The CDCASA greenhouse offers durability without breaking the bank, or you can opt for the stylish VEIKOU cedar frame. For indoor gardening, a Grow Tent 60x60x80 or a VIVOSUN system could be great fits. Want to know more about factors to contemplate?
Key Takeaways
- Consider a portable walk-in greenhouse for an affordable and easy-to-assemble outdoor gardening solution that provides ample space for plants.
- Utilize second-hand materials or DIY options to reduce costs while ensuring essential features like ventilation and light transmission are included.
- Explore the use of polycarbonate panels for their durability and excellent light transmission, ideal for budget-conscious greenhouse construction.
- Opt for compact designs that fit small spaces while maximizing vertical space, allowing for efficient growing without high expenses.
- Research local zoning regulations to avoid potential fines and ensure your greenhouse project aligns with budget and space constraints.
Amazon Product B0DW8VS43F
As an affiliate, we earn on qualifying purchases.
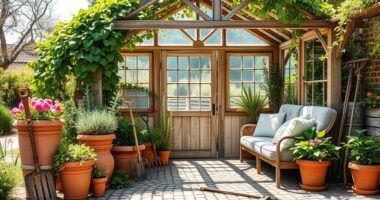
8X12 FT Portable Walk-in Greenhouse for Outdoors
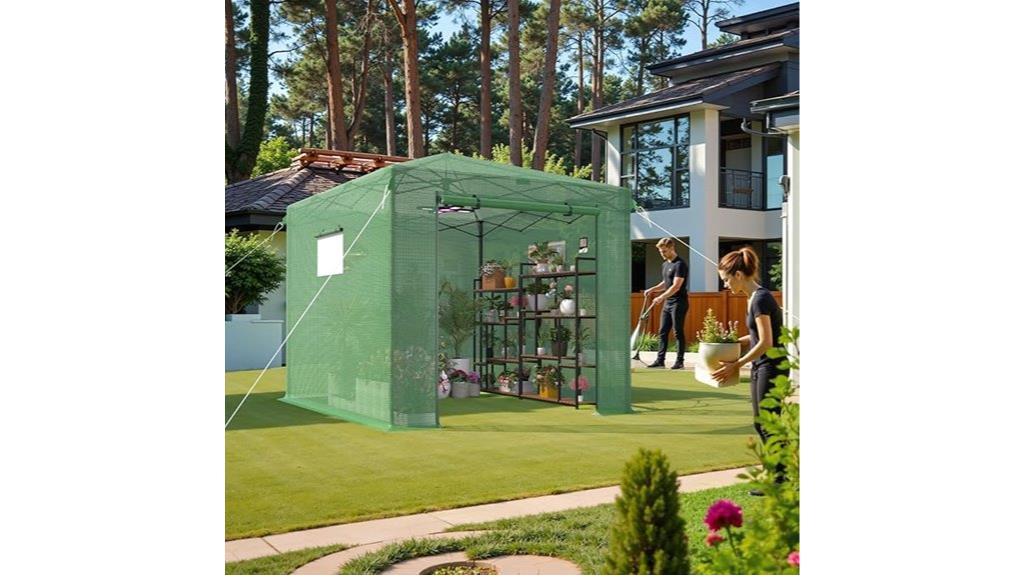
If you’re looking for an affordable greenhouse solution that’s easy to set up and perfect for outdoor gardening, the 8X12 FT Portable Walk-in Greenhouse is a fantastic choice. I love how its pre-assembled frame allows two of us to set it up without any tools. The spacious design gives me easy access while the roll-up zipper door and mesh windows guarantee great ventilation. Plus, the durable PE cover protects my plants from harsh weather. With ground anchors for stability, I feel secure knowing my veggies and herbs are thriving. This greenhouse has truly enhanced my gardening experience!
Best For: Gardeners looking for a portable and easy-to-assemble greenhouse solution for outdoor use.
Pros:
- Easy setup: Pre-assembled frame allows for quick installation without tools.
- Spacious design: Walk-in feature provides ample room for gardening tasks and plant care.
- Weather protection: Durable PE cover shields plants from rain, snow, and cold temperatures.
Cons:
- Limited size: The 8X12 FT dimensions may not accommodate larger gardening projects.
- Portable nature: While lightweight, it may be less stable in extreme weather conditions without proper anchoring.
- Material wear: The PE cover may degrade over time with prolonged exposure to UV rays.

Greenhouse Gardening for Beginners: Build Your Own Greenhouse and Grow Amazing Organic Vegetables, Fruits, Herbs, And Flowers All-Year-Round. | BONUS: Plans & Ideas for Extending the Growing Season
As an affiliate, we earn on qualifying purchases.
Greenhouse Gardening for Beginners: Build Your Own Greenhouse
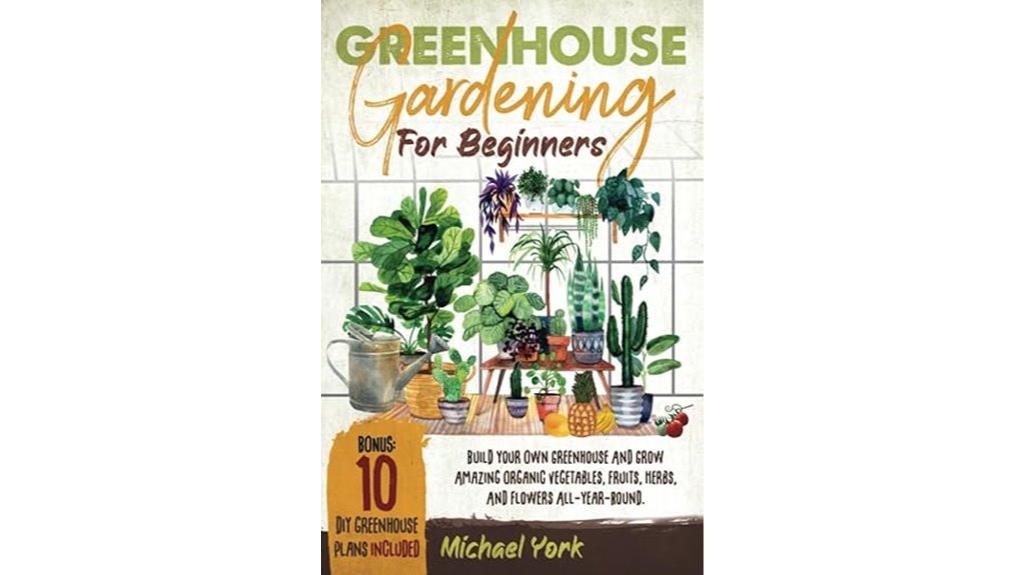
For anyone enthusiastic to plunge into the world of greenhouse gardening without breaking the bank, “Greenhouse Gardening for Beginners” is an ideal resource. Michael York simplifies the process of building your own greenhouse with clear, step-by-step instructions. You’ll learn about selecting structures, managing temperature, and maintaining healthy plants year-round. The book offers ten DIY projects that use recycled materials, making it budget-friendly. Plus, it features a planting calendar to help you grow various fruits, herbs, and flowers. Overall, this extensive guide inspires beginners like us to cultivate a thriving garden while staying mindful of our budgets.
Best For: Beginners interested in greenhouse gardening who want a budget-friendly and comprehensive guide to building and maintaining their own greenhouse.
Pros:
- Clear, step-by-step instructions make the greenhouse setup process easy to follow for novices.
- DIY projects using recycled materials help keep costs low while encouraging creativity.
- Comprehensive planting calendar allows for year-round gardening of various plants, including fruits, herbs, and flowers.
Cons:
- Some experienced gardeners may find the content too basic and lacking advanced techniques.
- The book could benefit from more illustrations to enhance understanding of complex concepts.
- Limited focus on specific plant varieties may not cater to all gardeners’ interests or advanced needs.

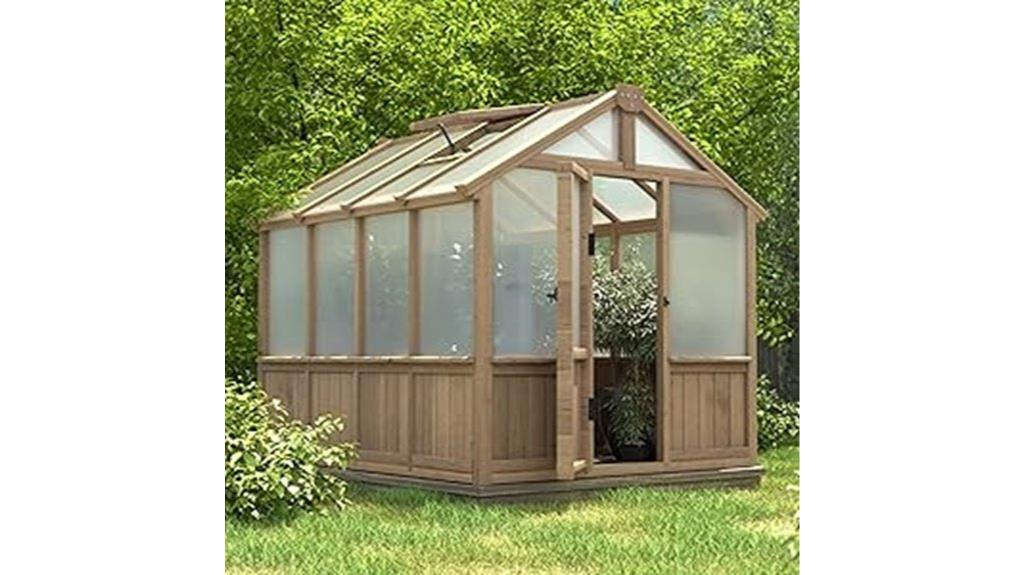
CDCASA 12.4x6.2 FT Greenhouse for Outdoors, Easy Assembly Thicker Aluminum Heavy Duty Polycarbonate Greenhouses Kit w/2 Window, Swing Door, Walk-in Green House for Outside, Patio, Backyard, Garden
Durable Panels: These 4mm twin-wall polycarbonate panels are nearly unbreakable. They allow 70% light transmission for optimal plant...
As an affiliate, we earn on qualifying purchases.
CDCASA Greenhouse for Outdoors
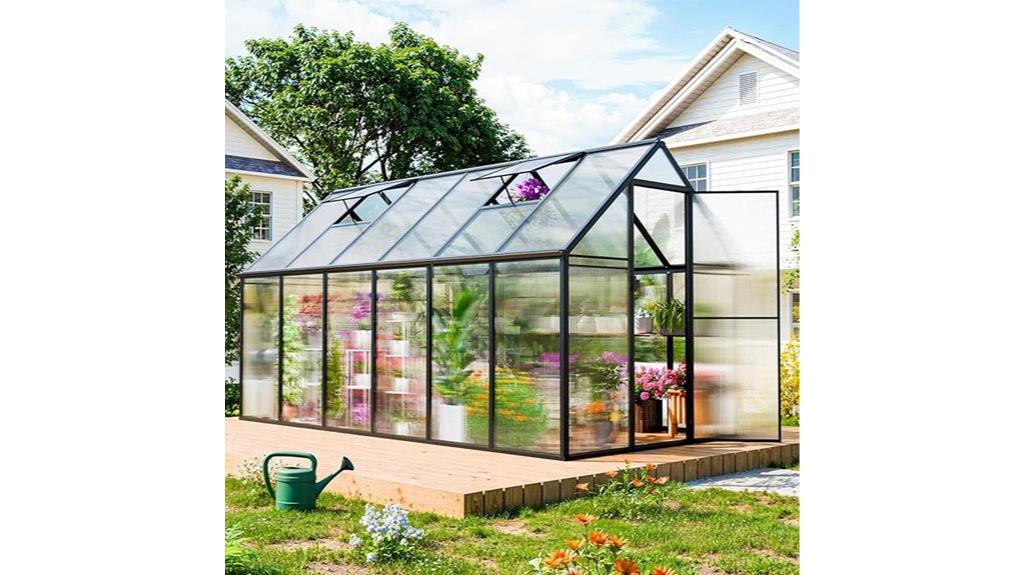
The CDCASA Greenhouse for Outdoors stands out as an excellent choice for gardening enthusiasts who want to cultivate their plants year-round without breaking the bank. Measuring 12.4×6.2 feet, this sturdy greenhouse features 4mm twin-wall polycarbonate panels and a rust-resistant aluminum frame, ensuring durability. It allows 70% light transmission while blocking over 99.9% of UV rays. Assembly is straightforward, taking about 4-6 hours with the right tools. I appreciate the adjustable vents for airflow and the swing door for easy access. While some assembly challenges exist, the overall value and performance make it a solid investment for any gardener.
Best For: Gardening enthusiasts looking for a durable and affordable greenhouse to cultivate plants year-round.
Pros:
- Durable construction with 4mm twin-wall polycarbonate panels and a rust-resistant aluminum frame.
- Allows 70% light transmission while effectively blocking over 99.9% of UV rays.
- Easy access with a swing door and adjustable vents for improved airflow.
Cons:
- Assembly may be challenging due to unclear instructions and alignment issues.
- Some customers reported shipping damage and responsiveness issues with customer service.
- Sharp edges during assembly require the use of gloves for safety.

VEIKOU 6x8FT Greenhouse, greenhouses for Outdoors with Cedar Frame, 6MM Thick Polycarbonate Panel, Green House with Adjustable Vent for Outside, Garden, Backyard
45° Adjustable Ventilation Window - A good greenhouse should allow plants to grow all year round. We should...
As an affiliate, we earn on qualifying purchases.
VEIKOU 6x8FT Greenhouse with Cedar Frame
Looking for an affordable yet stylish greenhouse option? The VEIKOU 6x8FT Greenhouse with a cedar frame might be just what you need. Its multi-layer polycarbonate panels provide excellent thermal insulation and diffuse light beautifully. Plus, the adjustable ventilation window helps manage heat and humidity. I love how the natural cedar frame not only looks great but also retains heat at night. Installation’s straightforward, but be ready to assemble it yourself. With solid accessories like reinforced hinges and UV protection, it’s designed to last. Overall, it’s a fantastic choice for anyone looking to enhance their gardening experience without spending a fortune.
Best For: Garden enthusiasts looking for an affordable and stylish greenhouse option to enhance their gardening experience.
Pros:
- Multi-layer polycarbonate panels provide superior thermal insulation and diffuse light effectively.
- The natural cedar frame offers both aesthetic appeal and heat retention at night, improving energy efficiency.
- Equipped with quality accessories such as reinforced hinges and UV protection for added durability.
Cons:
- Assembly may require some DIY skills, and instructions can be unclear for some users.
- Mixed reviews on assembly ease, with some customers reporting challenges during setup.
- Warranty and support details may require customer inquiries for clarification.
Grow Tent 60x60x80 Hydroponic Grow Tent
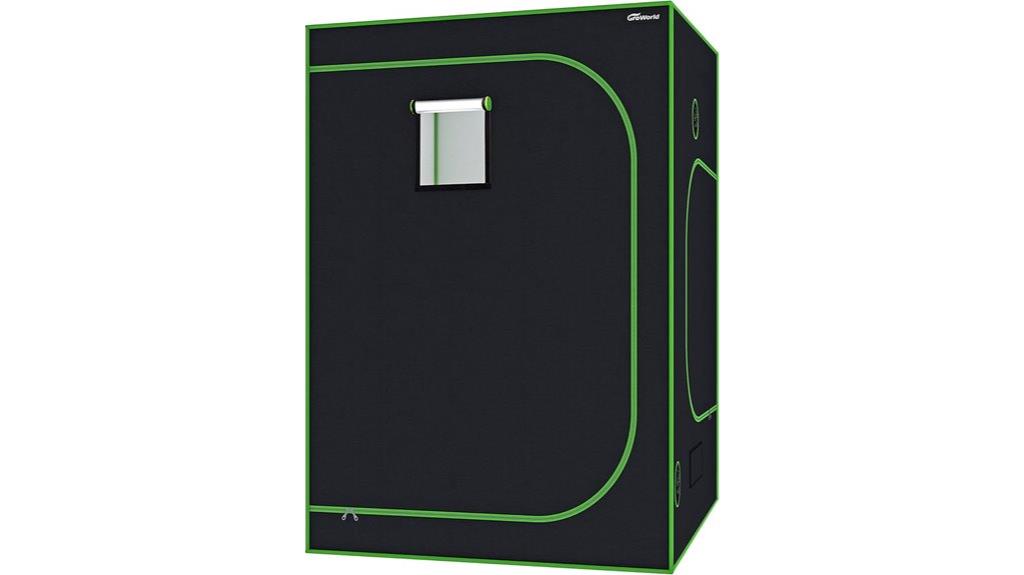
If you’re seeking a cost-effective solution for indoor gardening, the Grow Tent 60x60x80 Hydroponic Grow Tent is an excellent choice. I love its durable 600D fabric and non-toxic PE lining, ensuring my plants thrive safely. The tool-free assembly makes setup a breeze, and the sliding door and observation windows let me monitor growth easily. Plus, the removable waterproof floor tray simplifies clean-up. With multiple openings for ventilation and an internal tool organizer, it’s designed for convenience. It fits perfectly in my living room or garage, proving versatile for any space. Overall, it’s a fantastic investment for indoor gardening enthusiasts like me!
Best For: Indoor gardening enthusiasts looking for a versatile and cost-effective solution for growing plants in limited spaces.
Pros:
- Durable construction with commercial-grade 600D fabric and non-toxic PE lining ensures long-lasting use and plant safety.
- Tool-free assembly allows for quick and easy setup, making it accessible for beginners and experienced gardeners alike.
- Convenient design features like sliding doors, observation windows, and a removable waterproof floor tray enhance usability and maintenance.
Cons:
- Customer concerns about zippers and potential missing parts have been reported, which may affect overall satisfaction.
- Limited size options may not meet the needs of all gardeners, especially those requiring larger growing spaces.
- Weight of 34.9 pounds may make moving the tent difficult for some users, especially when fully assembled or filled with plants.
VIVOSUN Grow Tent Complete System (2 x 2 ft. Kit)
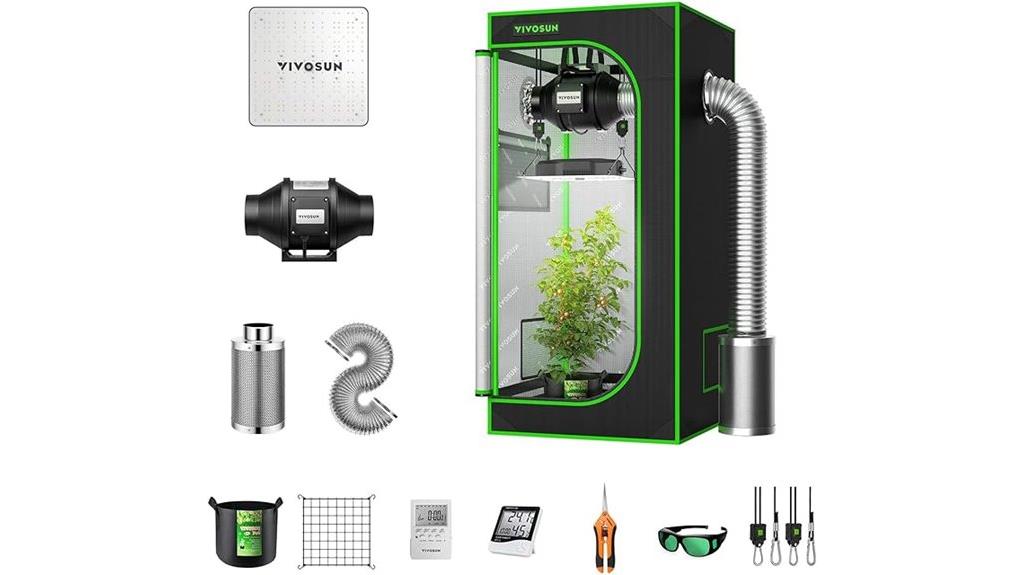
For those seeking an efficient and compact solution to indoor gardening, the VIVOSUN Grow Tent Complete System offers an ideal choice. Measuring 24 x 24 x 48 inches, this 2 x 2 ft. kit includes everything you need: a powerful VS1000 LED grow light, a 4-inch inline fan, and a carbon filter for air purification. Setup is straightforward, thanks to sturdy metal poles and elastic trellis netting. With a digital timer and temperature monitor, controlling your environment becomes easy. Customers rave about its quality and value, making it a fantastic option for budget-friendly indoor gardening.
Best For: Indoor gardeners looking for a compact and efficient all-in-one solution for growing plants in small spaces.
Pros:
- High energy efficiency with VS1000 LED grow light, consuming only 100W.
- Easy setup with durable metal poles and elastic trellis netting for plant support.
- Positive customer feedback on quality, construction, and overall value.
Cons:
- Some users reported issues with fan performance and height limitations.
- Durability concerns raised regarding zippers and initial setup confusion.
- Fan connectivity may require additional attention during installation.
Factors to Consider When Choosing Budget-Friendly Greenhouse Ideas
When I consider budget-friendly greenhouse ideas, I always weigh a few key factors. I think about my budget, the space I have available, and the materials that will last. Plus, I can’t overlook how well the greenhouse will work with my climate and how easy it is to set up.
Budget Constraints and Priorities
Choosing a budget-friendly greenhouse means maneuvering through a maze of priorities and constraints. I’ve learned that the size you choose can greatly affect costs; larger greenhouses typically require more materials and installation expenses. Prioritizing essential features like ventilation, light transmission, and durability helps guarantee I meet my growing needs without overspending. I’ve found that utilizing recycled materials for DIY projects can cut costs considerably while supporting sustainability. Comparing portable options to permanent installations has also clarified which structures fit my budget best. Finally, I always consider long-term maintenance costs alongside initial expenses, as some greenhouses might require more frequent repairs, ultimately impacting my overall budget. Balancing these factors makes achieving my gardening goals more feasible.
Space Availability Requirements
Space availability is a significant factor in selecting a budget-friendly greenhouse that meets my gardening needs. I need to evaluate the total area I have, ensuring it accommodates the desired dimensions while allowing easy access and movement around the structure. Vertical space is just as important; taller greenhouses can maximize growing potential without requiring a larger footprint. I also have to take into account local zoning regulations, which might dictate minimum or maximum space allocations for installations. Planning for extra space around the greenhouse is essential for maintenance activities like watering and pruning, avoiding overcrowding. Finally, I must assess existing landscaping or structures that could limit accessibility or sunlight exposure, as both are critical for healthy plants.
Material Durability Considerations
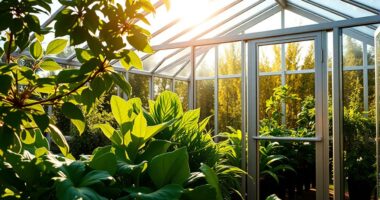
Considering the available space is just the beginning; material durability plays a significant role in the longevity and effectiveness of my budget-friendly greenhouse. I’ve found that polycarbonate panels are an excellent choice, providing up to 70% light transmission while blocking over 99.9% of UV rays—perfect for plant health. For a sturdy frame, heavy-duty steel offers stability against harsh weather, while rust-resistant aluminum is great for humid climates. Don’t overlook the importance of a high-quality PE cover, which protects against rain and snow, ensuring ideal conditions year-round. Finally, I consider the nominal wall thickness; materials with a thickness of 0.15748 inches enhance insulation and structural integrity, making my greenhouse more durable in the long run.
Climate Suitability and Protection
While evaluating budget-friendly greenhouse options, I always keep the local climate at the forefront of my decision-making. The materials and design must withstand my region’s temperature extremes, precipitation, and wind conditions. I’ve found that greenhouses with high-quality covers, like PE or polycarbonate panels, effectively protect against harsh weather, enhancing plant survival. Effective ventilation is vital too; incorporating roll-up doors and adjustable vents helps regulate temperature and humidity for various plant types. I also prioritize a durable frame that can handle snow loads and high winds. Finally, using transparent or light-diffusing materials maximizes light transmission, promoting healthy growth while shielding plants from excessive heat and cold. These factors are essential for creating a thriving greenhouse environment.
Assembly and Setup Ease
When I choose a budget-friendly greenhouse, I always prioritize how easy it is to assemble. I look for options with pre-assembled frames that allow for a quick two-person setup without any tools. This saves time and frustration! Designs featuring quick opening and folding mechanisms make installation, transportation, and storage a breeze. I also prefer greenhouses that come with clear instructions or video guides, as they greatly reduce setup time. Modular designs are another plus; they often include rain gutters for better drainage and easier maintenance. Finally, I check customer feedback on assembly experiences to gauge potential challenges or advantages. A little research goes a long way in ensuring a smooth setup process!
Ventilation and Temperature Control
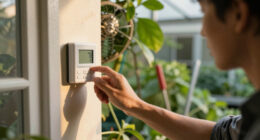
Effective ventilation and temperature control are essential for creating a thriving environment in your budget-friendly greenhouse. I’ve found that adjustable vents and roll-up doors work wonders for promoting airflow. To keep temperatures stable, consider materials like multi-layer polycarbonate panels; they retain heat during colder nights while still allowing diffuse light in. Adding fans or automated systems can enhance air circulation, helping to prevent overheating and reduce plant diseases linked to stagnant air. I recommend combining passive methods, like side vents, with active systems, such as exhaust fans, to adapt to changing weather. Finally, using digital monitors to track temperature and humidity lets me make informed decisions about vent management, ensuring a consistent environment for my plants.
Plant Growth Optimization
Creating a thriving environment in your greenhouse not only hinges on ventilation and temperature control but also on enhancing plant growth. I’ve found that using a transparent cover maximizes light transmission, which is essential for photosynthesis and healthy plants. Maintaining ideal ventilation with roll-up doors and mesh windows helps regulate temperature and humidity, creating favorable conditions for diverse plant species.
Additionally, implementing thermal insulation, like multi-layer polycarbonate panels, boosts heat retention during colder months, allowing for year-round cultivation. A well-structured greenhouse protects plants from harsh weather, reducing stress and promoting robust growth. Finally, I recommend employing a strategic planting calendar to align with seasonal changes, ensuring your plants thrive during their ideal growth periods for maximum yield and health.
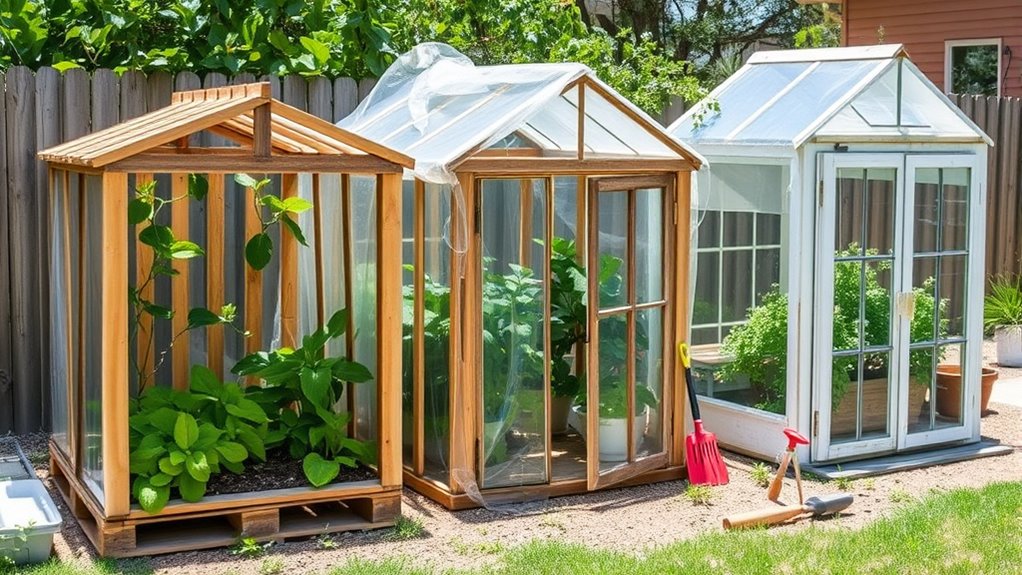
DIY vs. Pre-Made Options
Choosing between DIY and pre-made greenhouse options can feel overwhelming, especially if you’re on a budget and want to maximize your resources. DIY greenhouses can save money by using recycled materials, and they let you customize your design to fit your needs. However, they might require more maintenance and troubleshooting. On the other hand, pre-made greenhouses come with detailed assembly instructions and usually take less time to set up, making them perfect for those lacking DIY experience. While they can be pricier initially, the warranties and customer support are valuable for first-time owners. Ultimately, your choice should reflect your comfort level, creativity, and the amount of time you can invest in your greenhouse project.
Frequently Asked Questions
What Materials Are Best for a Budget Greenhouse?
When I think about building a budget greenhouse, I find that materials like PVC pipes and recycled windows work wonders. I’ve used clear plastic sheeting for the cover, which keeps costs low while allowing sunlight in. Pallets make great frames, and they’re often free. I’ve even seen folks use old doors as walls! It’s all about being resourceful and creative with what you can find, making the project fun and affordable.
How Can I Insulate My Greenhouse Cheaply?
Insulating my greenhouse cheaply has been quite the adventure! I’ve found that using bubble wrap is a game-changer; it’s lightweight and retains heat effectively. I also use old blankets or quilted covers during the coldest nights. If you can scavenge some foam boards, they work great for extra insulation. I’ve even considered using leftover plastic sheeting to create a double layer, which really helps keep the warmth in without breaking the bank!
What Plants Thrive in a Budget Greenhouse?
When I think about plants that thrive in a budget greenhouse, I always consider hardy varieties. I’ve had great success with tomatoes, peppers, and cucumbers, as they love the warmth. Herbs like basil and mint also flourish in a greenhouse setting. I’ve found that leafy greens, like spinach and lettuce, grow quickly and are easy to maintain. Overall, choosing resilient plants really helps maximize my greenhouse’s potential without breaking the bank.
Can I Build a Greenhouse Without Professional Help?
Absolutely, you can build a greenhouse without professional help! In fact, with a little determination, I believe anyone could construct an entire botanical paradise single-handedly, armed only with a hammer and some ambition. I’ve done it myself, and it was exhilarating! Just gather your materials, follow some simple plans, and let your creativity flow. You’ll be surprised at what you can achieve, and soon you’ll be nurturing your own thriving plants.
How Do I Maintain a Budget Greenhouse Efficiently?
Maintaining a budget greenhouse efficiently isn’t as challenging as it sounds! I focus on using recycled materials for construction and invest in good ventilation to keep costs down. Regularly checking for pests and diseases helps prevent bigger problems later. I also set up a rainwater collection system to minimize water bills. By keeping my plants organized and practicing crop rotation, I maximize space and resources, ensuring my greenhouse thrives without breaking the bank.
Conclusion
To sum up, finding fantastic, frugal greenhouse options doesn’t have to feel like a futile fight. Whether you opt for a portable walk-in wonder or a chic cedar-frame choice, you can cultivate your gardening dreams without draining your dollars. By considering your space and needs, you’ll surely succeed in selecting a budget-friendly solution that sparks joy. So, let’s get growing and enjoy the bountiful benefits of a beautiful, blossoming greenhouse!