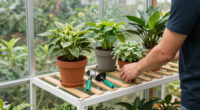
This guide walks you through installing shelving organizers inside your greenhouse. It helps you create efficient storage for tools, pots, and plants, making maintenance easier. Designed for gardeners of all experience levels, this task takes about 1 to 2 hours to complete.

Get garden gear delivered free with Prime
- Fast, free delivery on millions of items
- Prime Video, Amazon Music and more included
- Member-only deals all year
Difficulty: Beginner | Time: 1-2 hours
What You’ll Need
Tools & Materials:
- Cordless drill
- Measuring tape
- Level
- Screwdriver
- Pencil
Knowledge:
- Basic understanding of using power tools
- Ability to measure and mark surfaces
Ensure the greenhouse walls are sturdy enough to support shelving. Check the weight capacity of your chosen shelves and brackets.
As an affiliate, we earn on qualifying purchases.
Before You Start
Clear the area where you will install the shelves. Confirm the wall material (wood, metal, or concrete) to choose appropriate mounting hardware. Wear safety glasses during drilling.
Step-by-Step Instructions
Step 1: Measure and mark shelf locations
Use the measuring tape to determine the desired height and length for each shelf. Mark these points on the wall with a pencil, ensuring even spacing and level placement.
Tip: Use a level to draw straight, horizontal lines for each shelf line to ensure proper alignment.
Check: Marks are evenly spaced, level, and clearly indicate where brackets will be installed.
Step 2: Install mounting brackets or supports
Align brackets with the marks, and drill pilot holes into the wall at each point. Secure brackets using appropriate screws or anchors depending on your wall material.
Tip: Use wall anchors if mounting into drywall or hollow surfaces to strengthen support.
Check: Brackets are firmly attached, level, and capable of supporting the weight of the shelves and items.
Step 3: Place shelves onto brackets
Position each shelf onto the installed brackets, ensuring they sit evenly and securely. Use screws or locking mechanisms if available to fix the shelves in place.
Tip: Test each shelf by applying gentle pressure to confirm stability before placing items on them.
Check: Shelves are level, stable, and securely attached to brackets.
Step 4: Organize and load shelves
Arrange your tools, pots, and plants on the shelves, distributing weight evenly. Keep heavier items on lower shelves for stability.
Tip: Use storage bins or trays to keep smaller items organized and prevent clutter.
Check: Items are neatly arranged, stable, and accessible, with no signs of overloading or instability.
Common Mistakes to Avoid
- Installing shelves too high or unevenly — Use a level and precise measurements during marking to ensure even placement.
- Using inappropriate hardware for wall material — Identify your wall type and select matching anchors and screws for secure mounting.
- Overloading shelves beyond their weight capacity — Check the weight limits and distribute heavy items on lower shelves to avoid collapse.
Troubleshooting
Problem: Shelves feel unstable or wobble
Solution: Tighten screws and brackets, verify proper wall anchors, and ensure shelves sit firmly on supports.
Problem: Drilling into hard concrete or brick
Solution: Use a masonry drill bit and appropriate anchors designed for masonry surfaces.
Problem: Shelves sag or bow under weight
Solution: Reduce load, add additional support brackets, or choose stronger shelving materials.
What Success Looks Like
The shelves are securely mounted, level, and able to support your stored items without wobbling or collapsing. Items are organized and easily accessible.
Next Steps
Regularly check the stability and cleanliness of your shelving. Adjust or reinforce brackets as needed. Consider labeling shelves for better organization or adding hooks for hanging tools.
Frequently Asked Questions
Can I install shelves on a metal greenhouse wall?
Yes, use appropriate metal wall anchors and screws designed for metal surfaces. Drill pilot holes first to prevent wall deformation.
What weight capacity should my shelves have?
Choose shelves that support at least 20-50 pounds per linear foot, depending on your stored items. Check manufacturer specifications for maximum load.
How often should I check the stability of my shelves?
Inspect monthly for loose screws or wobbling. Reinforce or tighten hardware as needed to maintain safety.
Can I install adjustable shelves?
Yes, use adjustable brackets or rails that allow repositioning shelves at different heights for versatility.
Halloween Picks
halloween
As an affiliate, we earn on qualifying purchases.