
TL;DR

Get garden gear delivered free — and shop member deals
- Fast, free delivery on millions of items
- Access to Prime Big Deal Days deals on October 6–7
- Prime Video, Amazon Music and more included
Halloween-themed greenhouse decorations can create a memorable seasonal display when you keep decorations clear of plant leaves, sunlight, airflow, and visitor paths. Use weather-suitable, non-toxic materials, choose low-heat LED lighting, and build the mood with a focused theme such as a haunted forest or glowing pumpkin patch.
A greenhouse already looks a little magical after dark: glass catches the moonlight, leaves turn into silhouettes, and a single lantern can make a familiar path feel like a secret garden. That makes it a natural stage for Halloween-themed greenhouse decorations—as long as the decorations don’t crowd the plants or trip your visitors.
You can create a haunted forest, a cheerful pumpkin patch, or a witch’s potting shed with a few well-chosen details. The trick is to decorate around the growing space, not over it. This guide covers themes, plant-safe placement, materials, lighting, DIY projects, and visitor safety, with practical examples you can adapt to a small backyard greenhouse or a public display.
Choose one Halloween theme and repeat a small palette, such as black, orange, purple, and green.
Keep decorations clear of plant leaves, vents, glazing needed for light, and watering access.
Use stable, weather-suitable props and keep loose pieces, sharp edges, and cords away from visitors.
Choose LED lights, follow product instructions, and test the display after sunset.
Add one accessible interactive feature, such as a photo corner or painted-gourd vote, without sending visitors into plant beds.
Choose a Halloween theme that lets your plants stay in the spotlight
Halloween-themed greenhouse decorations work best when you pick one clear mood and repeat a small set of colors and motifs. A greenhouse’s living plants already supply texture and color, so a focused theme—such as a moonlit forest or a cheerful pumpkin patch—looks more intentional than a jumble of unrelated props. Limiting the theme also helps you decide what not to add: fewer competing objects leave the plants visible and make each chosen detail feel deliberate.
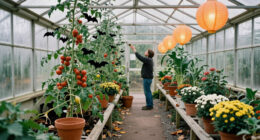
Start with a palette that suits the plants you have. Black, orange, purple, and green create a classic Halloween look: black silhouettes pop against glass, orange gourds warm up a leafy corner, and purple light adds a twilight glow. The tradeoff is that strong colors and dark materials can absorb attention—and, if they cover glazing, reduce useful light. For example, a greenhouse with tall ferns could become a haunted forest using paper bats, a few lanterns, and a winding path of fallen leaves kept clear of the main walkway. The ferns supply the forest texture, so the decorations can stay sparse.
Let the structure guide your choices. Glass walls make hanging silhouettes visible from outside, while a sturdy potting bench can become a witch’s worktable with a cauldron-shaped planter and labeled jars of dried herbs. Using existing features reduces the need to bring in large props, which can take up floor space or complicate watering. These are themed greenhouse decorations that complement the plants rather than compete with them.
Try these theme ideas before you buy anything:
- Haunted forest: bats, shadowy branches, and warm lantern light.
- Mystical potting shed: reused jars, herb labels, and a simple “potion” display.
- Vintage pumpkin patch: painted gourds, straw-colored accents, and friendly ghosts.
A theme is a filter for every later decision. If a shiny prop clashes with your quiet haunted forest, leave it in the storage box; your display will feel calmer and more convincing. It also makes setup and cleanup easier: a small, coherent collection is simpler to secure, inspect, and store than a large assortment of unrelated decorations.
LED string lights for outdoor greenhouse
As an affiliate, we earn on qualifying purchases.
As an affiliate, we earn on qualifying purchases.
Protect plant health without losing the spooky atmosphere
To decorate without harming plants, keep props out of leaf canopies, preserve clear airflow, and avoid blocking the light your plants receive. These details matter because decorations can affect more than appearance: a prop that shades foliage changes the light reaching it, while objects pressed against leaves can hold moisture or physically damage delicate growth. Decorations should frame growing areas, not sit on foliage or cover vents. Think of the greenhouse like a shared kitchen: you can set a festive table, but you still need room to cook.
Use the important aspects of plant health as a quick placement check: light, airflow, watering access, and room to work. A black cloth draped over a sunny window might look dramatic, but it can shade plants that need full light. Instead, attach lightweight silhouettes to the frame above eye level, where they show against the glass without covering a large section of glazing. There is a balance here: adding more silhouettes may strengthen the Halloween effect, but too much coverage can compromise the greenhouse’s main job of letting light in.
Imagine you have a row of young tomato plants beneath a beam. A dangling paper ghost can sway overhead without touching stems, while a large plastic spider placed across the leaves could trap moisture or crush delicate growth. Leave space around fans and vents, and keep potting benches and hose connections usable. If you need to reach a plant for pruning or watering, your decoration is in the wrong spot. Keeping these work areas clear may mean sacrificing a convenient display surface, but it avoids turning routine care into a repeated obstacle course.
Do a short walk-through at plant level and visitor level before opening the display. Look for blocked light, tangled cords, fallen props, and leaves pressed against decorations. Plant care comes first; the eeriest effect is no use if your display leaves plants stressed or your path hard to navigate. Check again after the display has been in place for a while: plants grow, props shift, and a safe gap can gradually disappear.
Keep the spooky details in the air and along the edges. Clear leaves, vents, and work paths so your Halloween setup adds atmosphere without getting in the way.
Use durable, low-risk materials for a display that holds up
Choose Halloween decorations made from weather-suitable, non-toxic materials that won’t shed, drip, or create hazards in a warm, humid greenhouse. A semi-outdoor space can expose props to condensation, damp floors, and temperature swings, so lightweight indoor-only decorations may soften or fall apart faster than you expect. Material choice affects both safety and upkeep: a prop that deteriorates can leave debris near plants, need frequent replacement, or become unstable underfoot.
For a simple DIY, turn clean, sturdy jars into potion props: add paper labels, fill them with colored water, and seal the lids tightly. Place them on a stable table, away from plant pots and children’s reach. You get the visual effect of a potion bottle without loose powders or unknown contents, though glass can break if knocked over; in a busy public display, a suitable reusable plastic jar may be a safer compromise. You can also paint gourds and pumpkins with outdoor-suitable craft paint, then set them on a bench rather than directly on damp soil where they may decay sooner.
Reused cardboard, fabric scraps, and fallen branches can lower waste, but match the material to the location. Paper works well on a dry wall; it is less suitable beside a humid misting area, where it may sag and need replacing. Avoid loose glitter and small detachable pieces where children or pets may reach them, and choose props with smooth edges for crowded public spaces. If your display includes plants that may be toxic when chewed, keep children and pets from handling or tasting them. Reuse can be environmentally thoughtful, but only if the item remains sound and safe in its new setting.
For a quick material check, ask whether each item can get wet, whether it has sharp or loose parts, and whether it can be secured safely. Consider how it will be cleaned and stored, too: durable, reusable pieces may take more effort to prepare but can reduce waste over several seasons. Eco-friendly choices can still look polished: painted gourds, reused glass jars, and fabric banners make a rich display without filling a bin with single-use plastic.
Add eerie lighting without overheating plants or tangling paths
LED lighting creates a Halloween glow with less heat than traditional incandescent bulbs, making it a practical choice near plants and fabric decorations. Lower heat reduces one concern when placing lights near props, but it does not make every placement safe: electrical products still need to be suitable for the conditions and kept away from moisture. Use lighting to guide the eye toward a feature—a pumpkin bench, a framed silhouette, or the curve of a path—rather than flooding the whole greenhouse with colored light. A few focused sources create contrast; lighting every corner can flatten the shadows that make the display feel atmospheric.
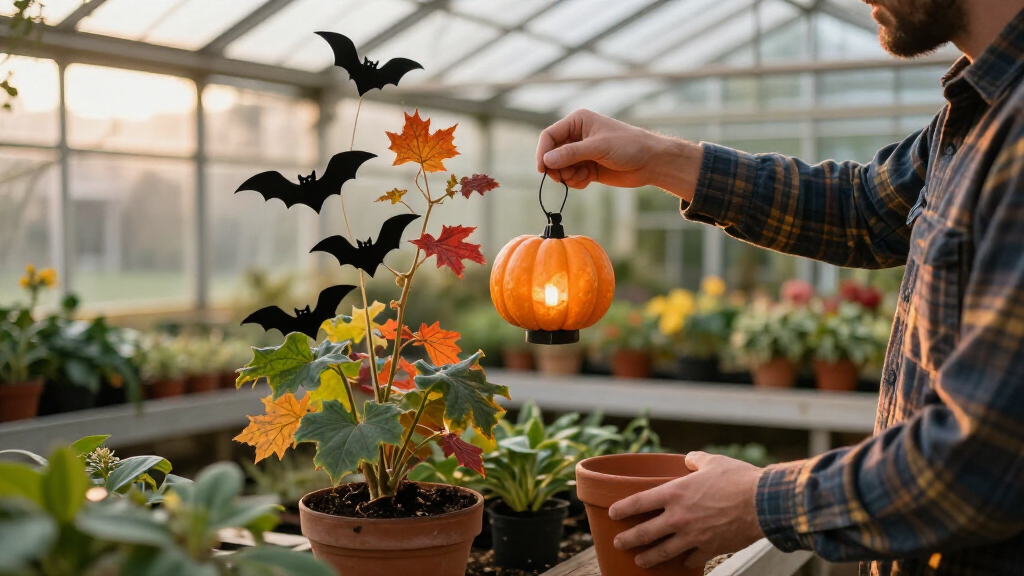
For example, wrap a warm-white LED string around a sturdy exterior frame and place a battery-powered lantern on a stable display table. A small splash of purple light can tint the glass like evening fog, while orange LEDs make pumpkins look bright and welcoming. Solar-powered lights can suit a spot that receives good daylight, though their charge may vary on cloudy autumn days. Battery and solar options can reduce the need for extension cords, but their brightness or runtime may be limited, so test them before relying on them to illuminate a route.
Keep bulbs and cables away from watering spray, damp soil, and walkways. Follow the lighting manufacturer’s instructions for indoor or outdoor use, and do not overload outlets or connect equipment not rated for the space. A cable can be both an electrical concern and a trip hazard, so routing it along a frame is often better than laying it across the floor. Check the setup after dark: what looks subtle at dusk may create harsh glare or hide a step later in the evening.
Use a short setup sequence to keep the effect both dramatic and practical:
- Choose one focal point, such as a glowing pumpkin display, so visitors have a clear visual anchor.
- Place low-level lights to make edges and walking routes easy to see; decorative mood lighting should not replace visibility where people walk.
- Add one accent color, such as purple or green, away from delicate foliage, where it can color the scene without dominating it.
- Test after sunset and adjust glare, shadows, and cable placement, since daylight can disguise dark spots and awkward reflections.
Good lighting acts like a stage cue: it tells visitors where to look and where to walk without making the plants feel as if they’re under a spotlight. Prioritizing safe route lighting may mean the display is less dramatic in one corner, but visitors can enjoy the atmosphere without guessing where the path ends.
Build an interactive display visitors can enjoy safely
An interactive greenhouse display gives visitors one simple way to participate, such as posing at a photo spot or choosing a favorite painted gourd. Keep the activity separate from plant beds and preserve a clear, stable route through the space. Clear paths and non-slip surfaces matter as much as the props, especially when visitors arrive in costumes or carry children. The activity should invite people to pause without forcing others to squeeze past them or step into growing areas.
Set up a photo corner beside a sturdy wall or bench, with a fabric backdrop, a lightweight scarecrow, and a marked place to stand. A family can take a picture without stepping between pots or brushing against delicate leaves. For a quieter activity, invite guests to vote for the most imaginative pumpkin planter with reusable paper tokens. The photo spot creates a memorable moment, while a voting activity can keep visitors engaged longer; either option needs enough room for a small group to gather without blocking the main aisle.
Sound effects and motion sensors can add a surprise, but use them with care. A sudden shriek may delight some visitors and startle others, so offer a gentler option or keep effects in a clearly marked area. This is a tradeoff between theatrical impact and comfort: predictable, optional effects may feel less startling but are more welcoming to young children and visitors who are sensitive to sudden noise. Avoid cords across walkways, low-hanging props at face height, and decorations that narrow doorways. If the greenhouse is open to the public, check that a wheelchair user can reach the main display and turn around comfortably.
Interactive details can support seasonal sales and visitor engagement, but they should never require people to touch plants or handle unknown materials. Put a small sign beside the activity with clear instructions; clear directions reduce confusion and help keep the activity moving during busy periods. A good visitor experience feels like a friendly invitation, not an obstacle course.
Finish the setup with a quick plant-and-safety walkthrough
A final walkthrough catches the problems you may miss while decorating: a blocked vent, a loose cable, a slippery patch, or a pumpkin placed where a door swings. Check the display once in daylight and again after dark, because greenhouse glass and shadows can change how a setup looks. Daylight helps reveal how props affect plant access and light; an after-dark check shows whether visitors can see the route and identify obstacles. Five minutes of checking can prevent a small decorating choice from becoming a plant-care or visitor-safety problem.
Consider a backyard setup with one central aisle, shelves of seedlings, and a small public viewing area. The owner hangs paper bats on the outer frame, places painted gourds on a bench, and lights the aisle with low LED lanterns. During the walkthrough, they spot one cable crossing the hose route and move it to the frame. That small change keeps watering simple and removes a trip hazard. The example shows why checking the display as a working greenhouse matters: an arrangement can look tidy for visitors but still obstruct the everyday tasks that keep plants healthy.
Use this checklist before visitors arrive:
- Plants: Are leaves, vents, and access to watering clear?
- Materials: Are props stable, non-toxic where appropriate, and suited to damp conditions?
- Lighting: Are bulbs and cables placed and used according to their instructions?
- Visitors: Are paths clear, surfaces safe, and interactive areas easy to understand?
These checks work together rather than in isolation. For instance, moving a light to clear a walkway could cast a new shadow over a step, while relocating a prop could block watering access. Review decorations after rain, heavy condensation, or a busy event. Paper may sag, a prop may shift, and leaves may grow into spaces that were clear a week earlier. Seasonal displays need small check-ins, not just a careful setup on the first day.
Frequently Asked Questions
How can I decorate my greenhouse for Halloween without harming plants?
Hang lightweight decorations from the greenhouse frame and keep them away from leaves, vents, and important light paths. Leave access for watering and pruning, and avoid placing props directly on delicate plants. For example, hang bats against the glass instead of draping a web across a row of seedlings.
What are easy DIY Halloween decorations for a greenhouse?
Painted gourds, paper silhouettes, fabric banners, and sealed jars with potion-style labels are simple options. Use materials that suit the spot: keep paper away from damp areas and set gourds on a bench rather than wet soil. Reusing clean jars and fabric scraps also cuts down on disposable decorations.
What lighting works best for a spooky greenhouse display?
Low-heat LED strings and lanterns work well for many seasonal displays. Place them to highlight a feature and keep cables away from water and walking routes. Follow the product instructions for the location and check the effect after dark so shadows do not hide steps or edges.
How do I make a Halloween greenhouse safe for children and pets?
Secure props, remove sharp edges and loose small pieces, and keep cords out of reach and off paths. Keep children and pets from chewing or handling plants that may be toxic, and supervise them around the display. If visitors use the greenhouse, make the route clear and avoid sudden effects near entrances.
Are eco-friendly greenhouse decorations practical?
Yes. Reused jars, fabric scraps, painted gourds, and carefully gathered fallen branches can create a strong display with less waste. Choose each material for its location, since paper and untreated natural items may not last in damp areas. Reusable LED lights can also replace many single-use decorations.
Conclusion
Build your Halloween greenhouse around the plants, not on top of them. Choose one theme, keep the growing space bright and breathable, and use a few carefully placed props and LED lights to create the mood.
Then walk the path as a visitor would—slowly, after dark, and with your hands full. If the way feels clear and the plants still look at home, your greenhouse is ready to glow.
Fall yard work Picks
leaf blowers
As an affiliate, we earn on qualifying purchases.