To prevent heat loss and save money, regularly check your doors and windows for drafts or cracks. When you notice gaps, carefully remove the old weather stripping using a putty knife or scissors, then measure the openings precisely to choose the right new material. Install the new weather stripping firmly, focusing on getting a snug fit all around. Staying on top of maintenance guarantees your home stays warm efficiently—keep going to discover more tips for long-lasting results.
Key Takeaways
- Regularly inspect weather stripping for signs of damage or gaps before cold weather arrives.
- Measure door and window gaps accurately to select the correct weather stripping material.
- Remove old weather stripping safely, cleaning surfaces thoroughly for proper adhesion.
- Install new weather stripping tightly, focusing on edges and corners to prevent drafts.
- Conduct seasonal maintenance checks to ensure continued energy efficiency and prevent costly heat loss.
weather stripping for doors and windows
As an affiliate, we earn on qualifying purchases.
As an affiliate, we earn on qualifying purchases.
Why Drafty Doors and Windows Cost You Money

Drafty doors and windows let warm air escape and cold air seep in, forcing your heating system to work harder. This reduces your home’s energy efficiency, making it more expensive to stay warm. When insulation effectiveness diminishes due to worn or damaged weather stripping, heat leaks become more common. As a result, your heater runs longer and consumes more energy, raising your utility bills. Over time, these small gaps add up, costing you significant money each season. Properly sealed doors and windows help maintain consistent indoor temperatures, improving insulation effectiveness. Regular maintenance and inspection of weather stripping integrity ensure your home remains energy-efficient year-round. Additionally, understanding common household guides can help you identify the best types of weather stripping for your specific needs. Being aware of indoor air quality factors can also motivate you to keep your home well-sealed and free of pollutants. Investing in good weather stripping now prevents energy waste, saves you money, and keeps your living space comfortable all winter long. Incorporating sound healing science principles, such as sealing gaps to prevent unwanted noise and vibrations, can also contribute to a more peaceful indoor environment.
How to Tell When Your Weather Stripping Needs Replacing

Knowing when your weather stripping needs replacing can save you money and keep your home warm. One way to tell is by seal gaps around doors and windows—if you feel drafts or cold air, it’s a clear sign. You might also notice increased heating bills or difficulty maintaining consistent indoor temperatures. Check the material options; if your weather stripping is cracked, brittle, or falling apart, it’s time to replace it. Even if it looks intact, perform the dollar bill test: close the door or window with a dollar bill in place. If it slips out easily, the seal isn’t effective anymore. Replacing worn or damaged weather stripping guarantees proper sealing, reducing heat loss and preventing drafts that can raise your heating costs. Additionally, choosing the right weather stripping material can improve your home’s insulation and durability over time. Considering essential oils for home health can also enhance your indoor environment, promoting comfort and well-being. Recognizing the importance of home insulation can help you select the best materials for long-term savings and comfort. Proper installation techniques and understanding different DIY tools can make the replacement process easier and more effective. Understanding the cryptid mysteries behind elusive creatures can also remind us how perception influences our environment, just as weather stripping affects our home comfort.
Choosing the Best Weather Stripping for Your Home

Choosing the right weather stripping depends on your home’s specific needs and the areas you’re sealing. To maximize material durability and energy efficiency, consider these options:
Selecting weather stripping tailored to your home ensures durability and better energy savings.
- Foam tape – Ideal for gaps around windows; inexpensive, easy to install, but less durable.
- V-strip or tension seal – Great for doors; offers good flexibility, improving energy efficiency over time.
- Rubber or vinyl – Best for high-traffic areas; provides long-lasting durability and maintains a tight seal.
Assess the location and the level of wear when selecting your weather stripping. Durable materials ensure longer-lasting protection, and energy-efficient options help reduce heating costs. Picking the right type makes all the difference in keeping your home warm and saving money.
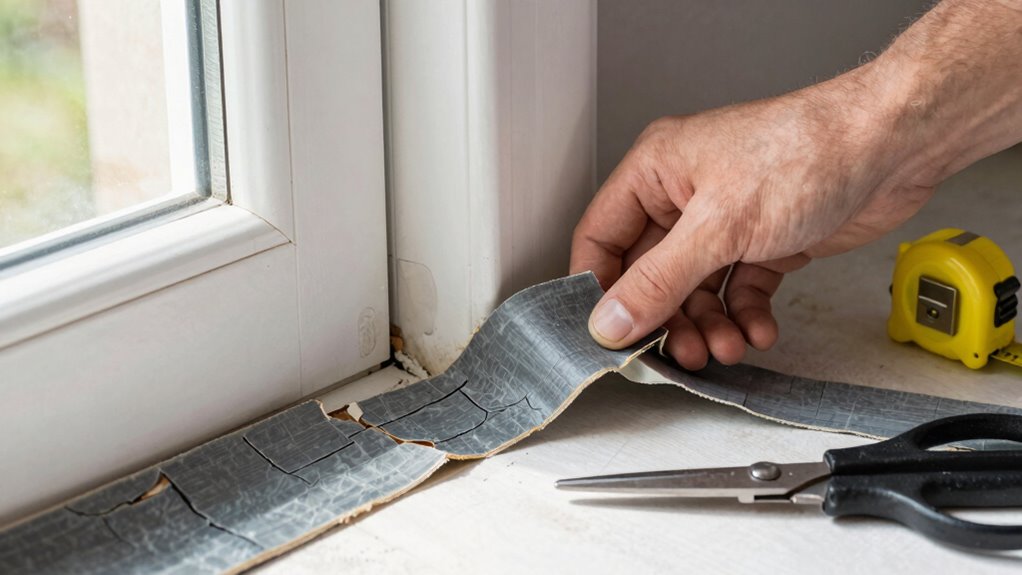
How to Remove Old Weather Stripping Safely
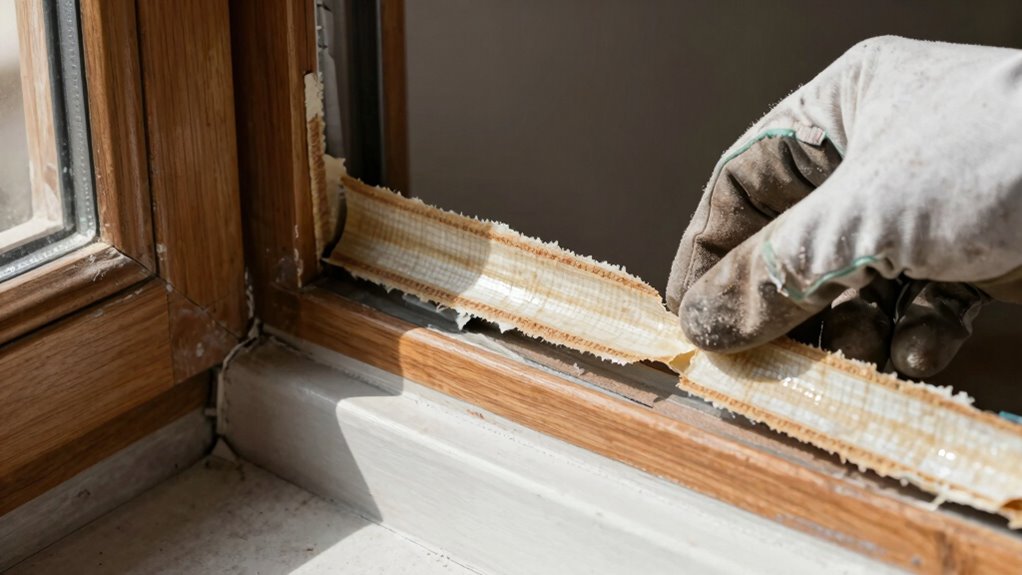
Removing old weather stripping is an important step to guarantee a proper seal when installing new material, but it must be done carefully to avoid damaging your doors or windows. Start by gathering your DIY tools, such as a putty knife, scissors, and a utility blade. Always wear safety precautions like gloves and eye protection to prevent injuries. Gently pry the weather stripping away, avoiding excessive force that could harm the surface. If adhesive remains, use a solvent or warm soapy water to clean it thoroughly. Proper home maintenance routines can help identify issues before they become costly repairs. Being aware of weather stripping types ensures you select the best replacement for your needs. Understanding different materials used in weather stripping can also help you choose the most durable option for your climate. Additionally, knowing how to safely remove adhesives can make the process easier and prevent damage. When removing weather stripping, consider the door and window design to ensure a proper fit with the new seal. Here’s a quick guide to help you:
| Step | Tool Needed | Tip |
|---|---|---|
| 1 | Putty knife | Loosen edges carefully |
| 2 | Utility blade | Cut through stubborn adhesive |
| 3 | Cloth or scraper | Remove residue safely |
| 4 | Adhesive remover | Clean surface thoroughly |
| 5 | Gloves | Protect your hands |
Measuring Doors and Windows for New Weather Stripping
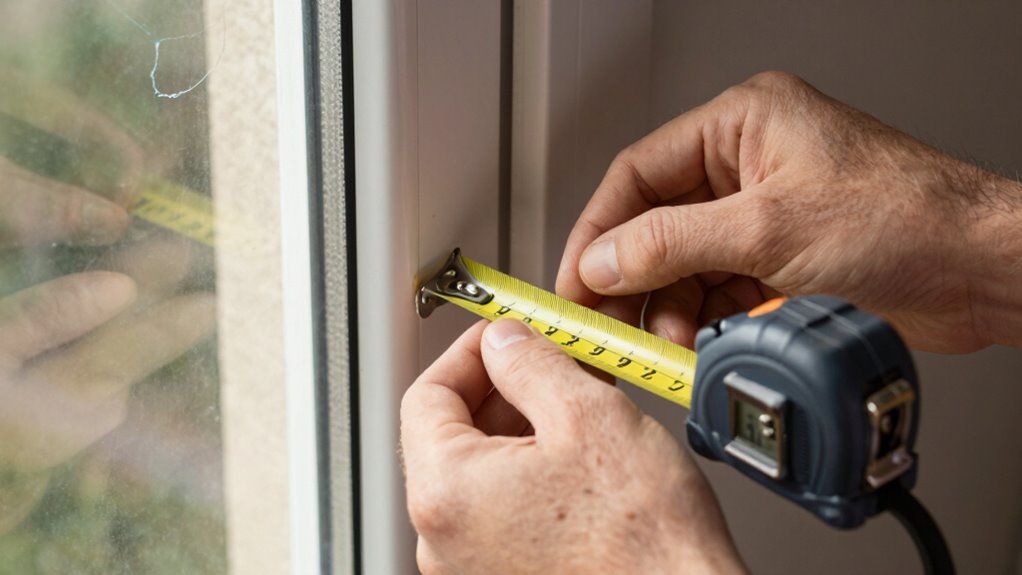
Before installing new weather stripping, you need to measure your doors and windows accurately to guarantee a proper fit. Proper measurements ensure the weather stripping withstands temperature fluctuations and maintains material durability over time. Here’s how to do it:
- Measure the width and height of each door and window opening, recording the smallest measurements to accommodate any irregularities.
- Check the existing gap depth to select the right weather stripping thickness, ensuring a snug fit without restricting movement.
- Note the material type suited for your climate—some materials expand or contract with temperature fluctuations, so choose accordingly.
- Consider weather stripping materials that are compatible with your climate and door or window type for optimal performance.
- Using precise measurements can also aid in system monitoring, helping you identify when replacements are needed before energy loss becomes significant. Additionally, understanding the importance of cookies on websites can help improve your online research process for choosing the best materials.
- Keep in mind that accurate measurements also help ensure the weather stripping remains effective over its expected lifespan, preventing the need for frequent replacements. Incorporating proper installation techniques can further enhance the effectiveness and longevity of your weather stripping.
Installing Weather Stripping for a Tight Seal
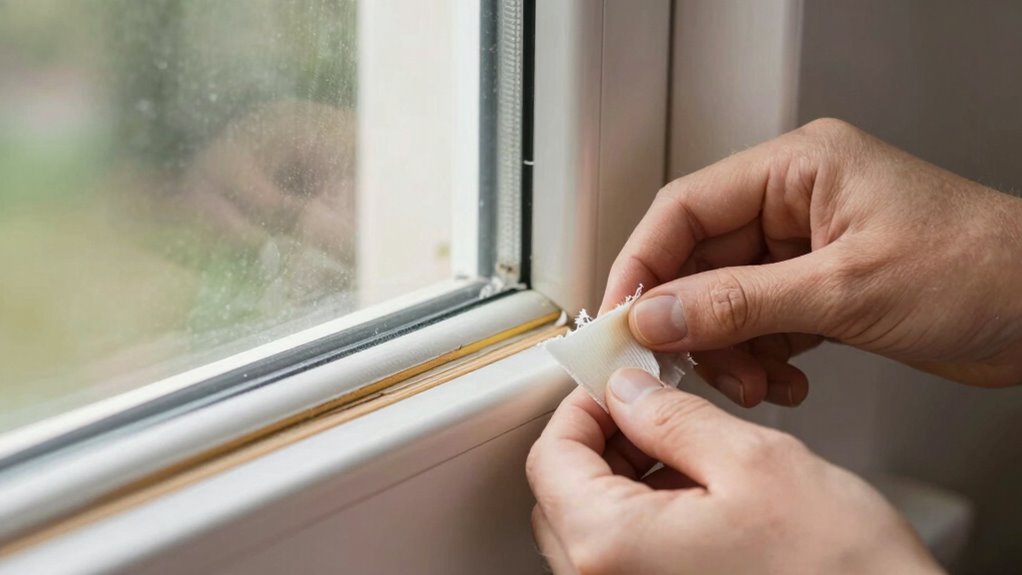
To guarantee your weather stripping works effectively, you need to choose the right material for your door or window. Proper installation techniques are vital to creating a tight seal that prevents heat loss. Pay attention to detail so you can install it correctly and maximize energy savings. Incorporating sustainable materials into your weather stripping can also contribute to overall urban greening efforts by reducing environmental impact. Additionally, selecting appropriate installation methods can help ensure the longevity and effectiveness of your weather stripping over time. Using quality sealing techniques can further enhance insulation performance and prevent drafts. Considering smart yard care solutions, such as automated weather sensors, can further optimize your home’s energy efficiency by adjusting insulation needs based on real-time weather conditions. Paying close attention to seasonal weather patterns can help you determine the best times to check and replace your weather stripping for optimal results.
Choosing the Right Material
Choosing the right material for your weather stripping is essential to guarantee a proper seal and maximize energy savings. You want something that balances material durability and aesthetic options, fitting your needs and home style.
Consider these options:
- Vapor-foam tape – affordable, easy to install, but less durable over time.
- Rubber or silicone – highly durable, flexible, and resistant to moisture, ideal for long-term use.
- Tight-fitting metal or vinyl – offers a sleek look and excellent durability, especially for exterior doors.
Think about how often the weather stripping will face wear and tear, as well as how it looks with your home’s design. Choosing the right material ensures a tight seal that lasts and keeps your heating bills down.
Proper Installation Techniques
Proper installation is key to guaranteeing your weather stripping provides a tight, effective seal. First, check adhesive compatibility to guarantee the weather stripping sticks securely without damaging surfaces. Measure carefully to cut the material to the right length, avoiding gaps that could compromise insulation properties. Clean the surface thoroughly before applying the weather stripping, removing any dust, dirt, or old adhesive. When installing, press firmly along the entire length to create a tight seal, ensuring there are no air leaks. Pay special attention to corners and edges for a seamless fit. Proper installation not only enhances insulation properties but also prolongs the life of your weather stripping. Take your time to do it right, and you’ll maintain a warmer home while reducing heating costs.
Tips to Maintain Your Weather Stripping and Save Energy
Regularly inspecting your weather stripping helps catch problems early, preventing drafts and energy loss. Maintaining it during seasonal changes keeps indoor air quality high and guarantees your home stays warm efficiently. To stay ahead, consider these tips:
Regular inspections prevent drafts, improve air quality, and keep your home warm and energy-efficient year-round.
- Check for cracks or gaps and reseal or replace damaged sections promptly.
- Clean weather stripping with mild soap and water to remove dirt and debris, maintaining its sealing ability.
- Schedule seasonal maintenance to review all weather stripping—this prevents small issues from escalating and keeps energy bills low.
Consistent upkeep not only saves money but also improves indoor air quality by reducing drafts and pollutants entering through gaps. Taking these simple steps helps your home stay comfortable while conserving energy year-round.
Frequently Asked Questions
Can Weather Stripping Be Reused After Removal?
Yes, you can often reuse weather stripping after removal, but it depends on its condition. If it’s still flexible, intact, and hasn’t deteriorated, recycling weather is possible by cleaning and reinstalling. However, if it’s worn or damaged, consider alternative materials like foam tape or new rubber strips. Reusing weather stripping saves money and reduces waste, but always check for proper sealing and functionality after reinstallation.
How Often Should I Inspect My Weather Stripping?
An ounce of prevention is worth a pound of cure. You should inspect your weather stripping at least twice a year, especially before seasonal changes, to guarantee ideal draft prevention and energy efficiency. Regular inspections help catch cracks or wear early, saving you money on heating and cooling costs. Don’t wait until drafts become noticeable—staying proactive maintains your home’s comfort and keeps energy bills in check.
Are There Eco-Friendly Weather Stripping Options Available?
Yes, eco-friendly weather stripping options are available. You can choose materials made from sustainable options like recycled silicone, hemp, or wool, which are both effective and environmentally conscious. These eco-friendly materials provide good insulation while reducing your carbon footprint. By selecting sustainable options, you’re not only saving energy and money but also contributing to a healthier planet. Always check product labels for eco certifications to guarantee you’re making the best green choice.
What Tools Are Needed to Install Weather Stripping?
To install weather stripping, you’ll need a few simple tools. Grab a utility knife or scissors to trim the material, a caulk gun for applying sealant compatibility, and a screwdriver or roller to press the strip firmly in place. Consider the material’s durability to guarantee your tools won’t damage it. These tools help create a tight seal, preventing drafts and optimizing energy efficiency in your home.
How Does Weather Stripping Affect Indoor Air Quality?
Weather stripping plays a essential role in maintaining good indoor air quality by sealing gaps that let in dust, pollen, and pollutants. When you replace it, you reduce drafts and prevent unwanted particles from entering your home. Although weather stripping isn’t a primary air filtration method, it complements air filtration systems by minimizing outdoor contaminants, keeping your indoor air cleaner, healthier, and more comfortable.
Conclusion
Don’t let leaky doors and windows turn your home into a money-draining, icy fortress! Replacing your weather stripping now is like giving your wallet a cozy, warm hug—saving you hundreds in heating bills and turning your house into a fortress of comfort. Act fast, seal those gaps, and watch your energy bills plummet. Before you know it, you’ll be laughing in the face of drafts—and your wallet will thank you for it!