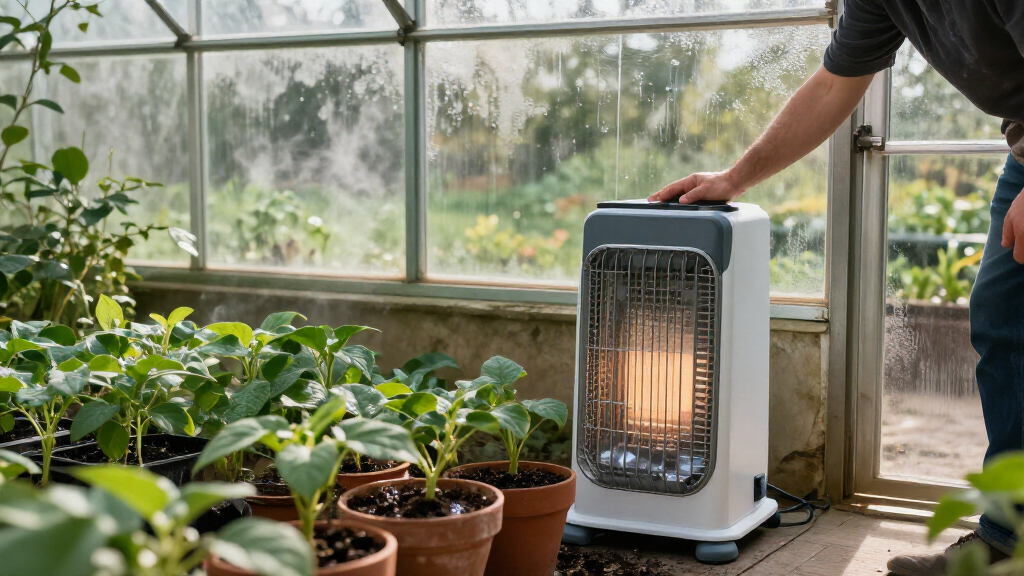

Use this guide to choose and set up a greenhouse space heater that keeps plants within their required temperature range. It is written for beginner greenhouse owners who can check a product label and follow basic electrical or fuel-safety instructions. Plan for 1–3 hours to measure the space, install the heater and controls, and check operation, followed by an overnight temperature check.

Get garden gear delivered free with Prime
- Fast, free delivery on millions of items
- Prime Video, Amazon Music and more included
- Member-only deals all year

SmterCon Greenhouse Heater with Digital Thermostat and Auto Power Control
- ✔ Heat output: 1500 watts
- ✔ Power source: Electric
- ✔ Amperage: 15 A

VEVOR 1500W Greenhouse Heater with Thermostat, Fan & High Heat Modes, Adjustable Angle, IPX4 & Overheat Protection
- ✔ Power output: 1500 watts
- ✔ Voltage: 120 V
- ✔ Amperage: 12.5 A

VEVOR 1500W Electric PTC Greenhouse Heater with Fan, Adjustable Angle and Overheat Protection
- ✔ Power output: 1500 watts
- ✔ Voltage: 120 V
- ✔ Amperage: 8.33 A
Difficulty: Beginner | Time: 1–3 hours for setup; allow overnight to check performance
What You’ll Need
Tools & Materials:
- Tape measure
- Minimum-maximum greenhouse thermometer or digital thermometer with a remote sensor
- Heater manual and product rating label
- Stable, nonflammable heater stand if the model requires one
- Outdoor-rated extension cord only if the heater manual permits it
Knowledge:
- Basic greenhouse dimensions and the coldest expected outdoor temperature
- The minimum temperature required by the plants being protected
- How to identify the electrical circuit rating or follow the fuel heater’s safety instructions
Check local electrical and fire-safety requirements before installation. Select a heater specifically rated for the greenhouse environment. Do not use a household heater, open-flame device, or unvented fuel heater unless its manufacturer and local rules explicitly permit greenhouse use. Fuel-burning heaters can produce carbon monoxide and water vapor; use the ventilation and carbon-monoxide protections specified by the manufacturer.
SmterCon Greenhouse Heater with Digital Thermostat and Auto Power Control
The SmterCon earns our top spot because it addresses a practical greenhouse challenge that the two VEVOR options leave more to manual adjustment: holding a chosen temperature automatically. Its digital thermostat can switch the heater on or off as conditions change, which may reduce the need to keep adjusting heat by hand. That makes it a stronger fit for growers who want temperature maintenance to be part of the heater’s operation rather than relying only on low or high settings.Like both VEVOR models, it supplies 1500W of electric heat and provides ventilation for air movement. Its stated coverage is about 120 square feet, a useful boundary to keep in view: greenhouse heat demand varies with insulation, outside temperature, and drafts, so that figure is not a guarantee for every structure. Compared with the VEVOR B0H5HNDP4R, the SmterCon prioritizes thermostat automation over a clearly specified angled outlet. Compared with the smaller VEVOR, its digital control is more suited to maintaining a target than switching between two heat levels.There are real setup tradeoffs. The supplied specifications call for a dedicated 15A circuit, so buyers should verify their circuit before choosing it. Its fan can also be noisy in quiet settings, which may matter if the greenhouse sits beside a living or work area. We would choose it for the control, provided the electrical setup and stated coverage fit the space.
Pros:
- Digital thermostat with automatic on/off control
- 1500W electric convection heating
- Adjustable ventilation for air circulation
- Fire-resistant construction and independent overheat protection
Cons:
- Fan noise may be disruptive in quiet spaces
- Stated coverage is limited to about 120 square feet
- Requires a dedicated 15A circuit for optimal performance
Best for: Growers with a small greenhouse who want a digital thermostat and automatic on/off temperature control, and who can provide the specified 15A circuit.
Not ideal for: Owners of large or drafty greenhouses, anyone without a suitable dedicated 15A circuit, or growers who need quiet operation.
Bottom line: Choose the SmterCon when automatic temperature maintenance matters most and its circuit and coverage requirements suit your greenhouse.
“Choose the SmterCon when automatic temperature maintenance matters most and its circuit and coverage requirements suit your greenhouse.”
VEVOR 1500W Greenhouse Heater with Thermostat, Fan & High Heat Modes, Adjustable Angle, IPX4 & Overheat Protection
Where the SmterCon emphasizes automated temperature control, this VEVOR gives us more control over where the warm air goes. Its outlet angle adjusts by 25°, providing more directional range than the 15° adjustment listed for the compact VEVOR. That can help when a grower needs to aim airflow toward a particular bench or growing zone rather than simply heating the area around the unit.The heater provides up to 1500W, plus a fan mode for air circulation when heat is not needed. Its built-in thermostat has two temperature settings, and the portable handle and stable base support moving it between locations. Those features make it a flexible manual choice for a small greenhouse, grow tent, or other space where a fixed heater is not practical. Compared with the SmterCon, however, its control is less automated: the supplied description does not specify the same digital setpoint and automatic on/off function. Buyers who want the heater to maintain a target temperature with minimal intervention should favor the SmterCon.The compromises are straightforward. At 7.1 pounds, it is substantially heavier than the other VEVOR at 3.7 pounds, so frequent relocation is less convenient. Its 120V and 12.5A specifications also make circuit planning important. We would pick this model for growers who value adjustable airflow and a fan mode, and who are comfortable using its two temperature settings rather than expecting fine-grained automation.
Pros:
- 1500W maximum heat output
- 25° adjustable angle for aiming airflow
- Heating and fan modes
- Portable handle, stable base, and overheat protection
Cons:
- At 7.1 pounds, it is heavier to move than the other VEVOR
- Two temperature settings offer less adjustment than the SmterCon’s digital thermostat
- 12.5A draw requires attention to circuit capacity
Best for: Growers who want to direct warm airflow toward a specific bench or zone and value a dedicated fan mode.
Not ideal for: Buyers who need digital thermostat automation, frequently move their heater, or need to heat a large greenhouse with one unit.
Bottom line: Pick this VEVOR for its wider angle adjustment and practical fan mode when manually directed airflow matters more than automated temperature control.
“Pick this VEVOR for its wider angle adjustment and practical fan mode when manually directed airflow matters more than automated temperature control.”
VEVOR 1500W Electric PTC Greenhouse Heater with Fan, Adjustable Angle and Overheat Protection
This VEVOR is the easiest of the three to reposition: at 3.7 pounds, it weighs roughly half as much as the 7.1-pound VEVOR B0H5HNDP4R. Its compact 8.27 x 6.3 x 8.66-inch body is suited to a small growing area, a grow tent, or a greenhouse corner where a larger heater would be cumbersome. With 1500W output and a fan mode, it still offers the basic combination of warmth and air movement found across this lineup.Its distinction is portability, not precision. The heater has low and high settings and a manually adjustable 15° angle, while the SmterCon provides a digital thermostat with automatic power control and the larger VEVOR angles farther. That means we can reposition the compact unit easily, but we get fewer ways to fine-tune the temperature or direct the airflow. The listed 8.33A draw is lower than the other models’ stated current, though buyers should still check the circuit and follow the product’s electrical instructions.The product information lists a maximum temperature of 75°C, but that figure alone does not establish how effectively it will heat a greenhouse; space, insulation, and outside conditions matter. Its two settings may also be too coarse for sensitive plants or a grower seeking steady setpoint control. Choose this one when light weight and compact placement matter more than thermostat sophistication or a wide adjustment angle.
Pros:
- Lightest listed option at 3.7 pounds
- Compact dimensions for tight growing areas
- 1500W output with low and high heat settings
- Fan mode, adjustable angle, and overheat protection
Cons:
- Only two heat settings limit fine temperature adjustment
- 15° angle provides less directional range than the other VEVOR
- No digital automatic thermostat is specified
Best for: Growers with a small greenhouse, flower room, or grow tent who expect to move the heater and prefer a lighter unit.
Not ideal for: Buyers who need automatic temperature regulation, fine control between heat levels, or a broad airflow adjustment range.
Bottom line: Choose this compact VEVOR when easy repositioning matters more than automatic control or a wider adjustable angle.
“Choose this compact VEVOR when easy repositioning matters more than automatic control or a wider adjustable angle.”
As an Amazon Associate we earn from qualifying purchases.
Before You Start
Measure the greenhouse and identify cold spots, drafts, and nearby combustible materials. Decide the minimum safe temperature for the most cold-sensitive plants; different crops may need different conditions. Heating an entire greenhouse to suit one sensitive plant can use more energy, so consider grouping that plant in a smaller protected area. Keep water, damp soil, and condensation away from electrical connections. Never cover a heater or bypass its thermostat or safety shutoff.
Step-by-Step Instructions
Step 1: Measure the greenhouse
Measure the interior length, width, and height. Multiply length by width to estimate floor area, and note the glazing type, insulation, draftiness, and exposed wall area. Record the lowest outdoor temperature you expect during the heating season and the target temperature for your plants.
Tip:A small, leaky greenhouse needs more heat than a well-insulated one of the same floor area. Floor area alone cannot determine heater capacity.
Check: You have the greenhouse dimensions, a realistic cold-weather design temperature, and a target indoor temperature in writing.
Step 2: Choose a heater and energy source
Compare greenhouse-rated electric, vented gas, or other approved heaters using the manufacturer’s sizing guidance for your greenhouse conditions. Check the heater’s output, thermostat range, safety shutoffs, environmental rating, and required clearances. For an electric model, confirm that the circuit can handle its load without other high-power devices on the same circuit. For a fuel model, confirm that the fuel supply, ventilation, and installation meet the manual and local rules.
Tip:Ask a qualified electrician to assess a new circuit or fixed electrical installation. Do not assume an extension cord or household outlet is suitable for a high-wattage heater.
Check: The selected model can meet the heating need stated by its manufacturer, and its power source and installation requirements are available and compatible.
Step 3: Prepare a safe heater location
Place the heater on a firm, level surface where its air intake and outlet remain clear. Follow the stated clearances from plants, plastic film, benches, curtains, and other combustible items. Keep it away from hoses, irrigation spray, standing water, and foot traffic. Do not position it where warm air blows directly onto leaves or seedlings.
Tip:Secure the heater against tipping if the model allows it. Keep its plug, controls, and shutoff accessible without reaching over hot surfaces.
Check: The heater is stable, protected from water and impact, and has the clearance required by its manual on every side.
Step 4: Set up the power or fuel supply
Connect an electric heater directly to a properly rated, grounded outlet unless the manual specifies an approved alternative. Keep cords out of water, away from hot surfaces, and protected from damage. For a fuel heater, have any required fixed connection or vent installed by a qualified professional, then inspect the fuel line and vent as the manufacturer directs. Never operate a heater with a damaged cord, leaking fuel connection, or blocked vent.
Tip:Do not plug a heater into a power strip or use an undersized cord. Stop if an outlet, plug, or cord becomes hot, discolored, or gives off an odor.
Check: The connection matches the product instructions, and no cord, outlet, fuel line, or vent is damaged or obstructed.
Step 5: Position the temperature sensor
Place the thermostat sensor or a separate thermometer near plant height in the area you need to protect. Keep it out of the heater’s direct airflow, direct sun, and contact with cold glazing. If the greenhouse has distinct warm and cold zones, place a second thermometer in the coldest plant area.
Tip:A sensor next to the heater may read too warm and shut the heater off while plants elsewhere remain cold.
Check: The sensor measures representative air near the plants rather than the heater’s outlet or a sun-heated surface.
Step 6: Set the thermostat and safety features
Set the thermostat to the minimum temperature required by the plants, using the heater manual to understand its control scale. Enable built-in tip-over, overheat, or flame-failure protection as directed. For a fuel-burning appliance, install and maintain carbon-monoxide alarms as required by its instructions and applicable rules.
Tip:Do not set the thermostat higher to compensate for a poorly placed sensor; reposition the sensor first.
Check: The set point matches the plant temperature target, and all required safety devices are active.
Step 7: Run the heater and check temperatures
Turn the heater on according to its manual and watch it through a full heating cycle. Confirm that it starts, warms the greenhouse, and switches off and on as the temperature crosses the set point. Check the thermometer after the greenhouse has stabilized, then record its minimum and maximum readings overnight during cold weather.
Tip:Do not leave a newly installed heater unattended until you have confirmed normal operation and checked for unusual heat, smells, noise, or alarms.
Check: The heater cycles as expected, the coldest plant area stays above its required minimum, and no safety warning or abnormal condition appears.
Step 8: Adjust placement or heat loss
If the measured temperature falls below target, first check the sensor location, heater clearances, and whether doors or vents are leaking heat. Reduce drafts with greenhouse-safe sealing or add suitable insulation while preserving required ventilation. Reassess heater capacity before increasing the set point, and do not block vents or air intakes to retain warmth.
Tip:Repeat the overnight reading after each change; daytime readings alone may hide a cold-night shortfall.
Check: Overnight readings remain within the acceptable range for the plants without obstructing ventilation or violating heater clearances.
Common Mistakes to Avoid
- Choosing heater capacity from floor area alone. — Use the manufacturer’s greenhouse sizing guidance and account for glazing, drafts, exposed surfaces, and the coldest expected weather.
- Placing the thermostat sensor beside the heater or against cold glazing. — Position it near plant height in representative air, away from direct heat, sunlight, and cold surfaces.
- Using an undersized extension cord, power strip, or overloaded circuit. — Follow the heater’s electrical requirements and have a qualified electrician check circuits that may not support the load.
- Blocking ventilation or placing combustible materials too close to keep the greenhouse warmer. — Maintain the manufacturer’s clearances and ventilation requirements; reduce heat loss with appropriate sealing or insulation instead.
Troubleshooting
Problem: The greenhouse stays colder than the thermostat setting.
Solution:
Check that the sensor is near the plants and away from cold glazing, then confirm the heater is receiving power or fuel and cycling normally. Inspect for drafts and compare the heater’s capacity with the manufacturer’s sizing guidance. Add safe insulation or reduce leaks, then repeat an overnight temperature check.
Problem: The heater switches on and off frequently.
Solution:
Move the sensor out of the heater’s direct airflow and away from sunlight. Keep the heater intake and outlet clear, and check that the thermostat is not exposed to a rapid temperature change. Follow the manual if cycling continues.
Problem: A breaker trips or a plug, cord, or outlet feels hot.
Solution:
Turn off and unplug the heater if safe, and stop using the circuit. Do not reset a repeatedly tripping breaker or replace it with a higher-rated one. Have a qualified electrician inspect the circuit and connections before restarting the heater.
Problem: A fuel heater produces an unusual odor, soot, or a carbon-monoxide alarm sounds.
Solution:
Leave the greenhouse and move to fresh air. Follow the alarm’s emergency instructions and contact local emergency services if anyone feels unwell or the alarm continues. Do not restart the heater until a qualified professional has inspected it and its venting.
What Success Looks Like
The heater is stable and installed with the specified clearance, its power or fuel connection and safety devices meet the manual, and the thermostat sensor reads near plant height. During a cold overnight check, the coldest protected plant area stays within the required temperature range. The heater cycles normally, and there are no hot connections, fuel odors, soot, blocked vents, or safety alarms.
Next Steps
Check the minimum and maximum temperature readings each morning during cold weather, especially after changing the heater setting or greenhouse insulation. Keep the intake, outlet, sensor, and vent clear; inspect cords and fuel connections as the manufacturer directs. Before each heating season, clean and service the heater according to its manual. Recheck plant temperature needs as crops grow or change.
Frequently Asked Questions
What temperature should I set a greenhouse heater to?
Set it to the lowest temperature that protects the plants in the heated area. Check the needs of the most sensitive plants and use a thermometer near their height to confirm the overnight minimum.
Can I use a household space heater in a greenhouse?
Use a household model only if its manufacturer explicitly rates it for the greenhouse’s damp environment and the installation meets its instructions and local rules. Many household heaters are not designed for moisture, splashes, or continuous greenhouse operation.
Is an electric or fuel heater better?
Choose based on available power or fuel, greenhouse size and heat loss, installation requirements, and local safety rules. Electric heaters avoid on-site combustion exhaust but need a suitable circuit. Fuel heaters require safe fuel handling and any ventilation or carbon-monoxide controls specified by the manufacturer.
How can I tell if the heater is large enough?
Use the model’s sizing guidance for your greenhouse and winter conditions, then verify its performance with minimum and maximum temperature readings during cold nights. If the protected area falls below target while the heater runs continuously, review heat loss and capacity.
Can I leave the heater running overnight?
Only if the heater is rated and installed for that use, all clearances and safety instructions are followed, and the power or fuel supply is suitable. Monitor temperatures and check the heater’s operation before relying on it overnight.
Fall yard work Picks

EGO Power+ LB8803-2 Cordless Leaf Blower, 880 CFM, with Two 4.0Ah Batteries
As an affiliate, we earn on qualifying purchases.