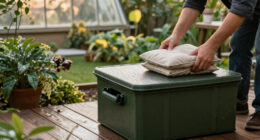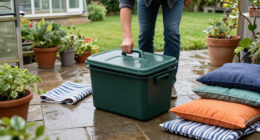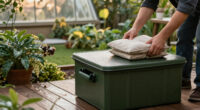
Choose and set up an outdoor weather-resistant storage box so cushions, garden tools, or other suitable items stay sheltered from rain and dirt. This guide is for beginners who can measure a space and follow basic assembly instructions. Allow 30-60 minutes for measuring, positioning, and setup; assembly may take longer if the box arrives unassembled.

Get garden gear delivered free with Prime
- Fast, free delivery on millions of items
- Prime Video, Amazon Music and more included
- Member-only deals all year

Keter Westwood 150-Gallon Outdoor Storage Box and Bench
- ✔ Capacity: 150 gallons
- ✔ Exterior dimensions: 61 × 28.3 × 25.2 inches
- ✔ Interior dimensions: 56 × 24.6 × 22.8 inches

Devoko 100-Gallon Waterproof Resin Deck Box
- ✔ Capacity: 100 gallons
- ✔ Exterior dimensions: 48 × 22 × 24.5 inches
- ✔ Interior dimensions: 47.8 × 21.4 × 24.6 inches
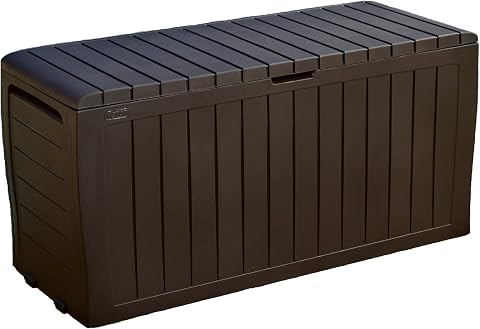
Keter Marvel 71-Gallon Outdoor Storage Box
- ✔ Capacity: 71 gallons
- ✔ Exterior dimensions: 45.9 × 17.4 × 22.2 inches
- ✔ Interior dimensions: 44.6 × 15.6 × 20 inches
Difficulty: Beginner | Time: 30-60 minutes
What You’ll Need
Tools & Materials:
- Tape measure
- Level or straightedge
- Manufacturer’s assembly instructions
- Screwdriver or other tools specified by the manufacturer
- Stable base such as paving slabs, a deck, or a firm level surface
Knowledge:
- Basic measuring and ability to follow assembly instructions
Check the box’s stated capacity and weather protection before buying. Most outdoor boxes resist rain but are not airtight or suitable for submersion. Keep electronics, paper records, medicines, and other moisture-sensitive or valuable items indoors unless the manufacturer specifically rates the box and storage conditions for them.
Keter Westwood 150-Gallon Outdoor Storage Box and Bench
The Keter Westwood is the strongest all-round choice when a spacious deck box needs to do double duty. Its 150-gallon capacity leads this group, leaving more room for patio cushions, pool supplies, or garden tools than either the 100-gallon Devoko or 71-gallon Marvel. The wood-plank look also helps it read more like patio furniture than a plain utility bin, and the lid is designed to seat two adults.For outdoor use, the resin construction is described as weather resistant and resistant to rusting, peeling, and denting. A lockable lid and easy-lift mechanism add everyday convenience, particularly when the box is used often. Still, “weather resistant” is not a quantified water-ingress rating, so buyers storing valuable items in a fully exposed spot should not assume the box is airtight.The main tradeoff is scale. At 61 inches long and 28.3 inches deep, Westwood needs more room than the other picks, and the 39.1-pound box requires assembly. Compared with the lighter, roller-equipped Marvel, it is less convenient to shift around. Choose it when volume and built-in seating matter more than a small footprint.
Pros:
- Largest stated capacity in this group at 150 gallons
- Bench-style lid is recommended for up to 660 pounds and seating for two adults
- Weather-resistant resin is described as resisting rust, peeling, and denting
- Lockable lid with an easy-lift opening mechanism
Cons:
- Large footprint may be difficult to accommodate on a compact patio
- Assembly is required
Best for: Households with a roomy deck or patio that need to store bulky cushions and want seating built into the storage box.
Not ideal for: Small balconies, buyers who need to move a box frequently, or anyone requiring a documented waterproof rating for exposed storage.
Bottom line: We recommend Westwood when its generous capacity and dual-purpose seating justify the room it occupies.
“We recommend Westwood when its generous capacity and dual-purpose seating justify the room it occupies.”
Devoko 100-Gallon Waterproof Resin Deck Box
Devoko takes the middle position in both size and capacity: its 100 gallons exceed the Marvel’s 71, while its exterior dimensions are shorter and narrower than Westwood’s. That makes it a practical compromise for buyers who have more to store than a compact box can comfortably handle but don’t want the largest option in this lineup.Its most distinctive feature is the hinged, lockable lid with two gas rods, which supports controlled opening and closing. That can make regular access more manageable than a simple lid, especially when loading or retrieving patio items. The description calls the resin body waterproof and UV protected, offering a stronger stated water-protection claim than the weather-resistant descriptions for the two Keter models. No test rating is provided, however, so we can’t compare its protection under specific conditions.Devoko also serves as a bench with a stated 500-pound capacity. The drawback is its 55-pound weight, which is notably heavier than either Keter option despite its intermediate capacity. Side handles help with handling, but moving it once loaded may still take effort. It has one compartment, so small items won’t be separated from cushions or tools without organizers.
Pros:
- 100-gallon capacity bridges the gap between Marvel and Westwood
- Waterproof and UV-protected resin is specified in the product description
- Gas rods support controlled lid movement, and the lid locks
- Bench-style lid has a stated 500-pound maximum weight recommendation
Cons:
- At 55 pounds, it is the heaviest of the three listed boxes
- Single-compartment interior provides no built-in item separation
Best for: Buyers wanting a medium-capacity box with a controlled-opening lid and an explicitly stated waterproof design.
Not ideal for: Anyone who expects to move the box often, needs separate storage sections, or wants a tested water-ingress rating.
Bottom line: We’d choose Devoko for its combination of mid-range capacity and a gas-assisted, lockable lid, provided its weight is manageable.
“We’d choose Devoko for its combination of mid-range capacity and a gas-assisted, lockable lid, provided its weight is manageable.”
Keter Marvel 71-Gallon Outdoor Storage Box
The Keter Marvel suits patios where depth is at a premium. At 17.4 inches deep, it is the shallowest choice here, and its built-in handles and rollers make it easier to reposition than the heavier Devoko or larger Westwood. Its 71-gallon interior can hold a useful amount of cushions, garden tools, and pool accessories, but it is less suited to bulky loads than either of the other picks.Convenience is its clearest advantage: assembly is tool-free and described as taking about five minutes. The resin is weather and UV resistant, and the wood-look finish offers a furniture-like appearance without requiring natural wood. Its lid can function as a bench with a stated 485-pound capacity, the lowest of the three, though still a substantial stated limit for seating.Compared with Westwood, Marvel gives up a great deal of volume; compared with Devoko, it lacks the gas-rod lid and the stronger “waterproof” wording. Its description also does not provide a specific ingress rating. The plastic resin look won’t satisfy buyers seeking real wood, and the narrower interior may rule out larger cushions. Choose it for easy setup and mobility when those compromises fit your storage needs.
Pros:
- Shallow 17.4-inch exterior depth fits tighter spaces
- Tool-free assembly is described as taking about five minutes
- Built-in handles and rollers make repositioning easier
- Weather-resistant and UV-resistant resin with a bench-style lid
Cons:
- 71-gallon capacity is the smallest in this comparison
- Plastic resin finish may not appeal to buyers seeking natural wood
Best for: Apartment or townhouse residents who need a shallow, movable deck box for smaller outdoor accessories and value quick assembly.
Not ideal for: Buyers storing oversized cushions, prioritizing the most capacity, or seeking a natural wood appearance or explicit waterproof claim.
Bottom line: Marvel is the sensible pick for compact spaces where simple setup and easier repositioning matter more than maximum storage.
“Marvel is the sensible pick for compact spaces where simple setup and easier repositioning matter more than maximum storage.”
As an Amazon Associate we earn from qualifying purchases.
Before You Start
Measure the intended location and check the box’s assembled dimensions, including lid clearance. Choose a firm, level spot where water does not collect and the lid can open fully. Leave enough room to reach the box without blocking a path, drain, vent, or gate. If the box will sit on a balcony or elevated deck, check the structure’s load limit before filling it.
Read the assembly and care instructions first. Some plastics can warp in strong sun, while metal can heat up and may need protection from standing water. Follow the manufacturer’s guidance for anchoring, ventilation, and weather exposure.
Step-by-Step Instructions
Step 1: Measure the location and storage needs
Measure the available width, depth, and height, then compare those measurements with the box’s exterior dimensions. Check the lid’s opening path and leave clearance for it. List the items you plan to store and estimate their combined volume; choose a box with spare room so items can be placed inside without forcing the lid shut.
Tip:Measure bulky items such as folded cushions in their stored shape. Interior dimensions are smaller than exterior dimensions and may be reduced by hinges or braces.
Check: The box fits the chosen space with room to open the lid and reach the contents.
Step 2: Select a box suited to its exposure
Compare materials, capacity, lid design, and care requirements. Look for a sloped or overlapping lid, fitted lid edges, and durable hinges. If the box will face heavy rain or direct sun, check that the manufacturer describes it for those conditions. Match the capacity rating to the weight of the items, not just their volume.
Tip:“Weather-resistant” does not necessarily mean waterproof. Check the product details for limits on rain exposure, UV resistance, and whether the box needs an indoor or covered location.
Check: The product specifications fit the site’s weather and the types and weight of items you intend to store.
Step 3: Prepare a firm, draining base
Clear leaves, dirt, and loose debris from the location. Set the box on a firm, level surface such as paving or a sound deck, following the manufacturer’s instructions. Keep the base above areas where rainwater pools, and do not block nearby drains. Use a level or straightedge to check that the surface does not make the box tilt.
Tip:Do not place the box directly on soft soil if it can sink or settle. A stable base helps the lid align and prevents water from gathering underneath.
Check: The base feels stable, sits level, and does not have standing water around it.
Step 4: Assemble and position the box
Assemble the box in the order shown in its instructions, using only the supplied hardware or specified replacements. Tighten fasteners as directed without forcing them, since overtightening can crack plastic or distort panels. Position the finished box on the prepared base, then open and close the lid to check that it moves freely and meets the rim evenly.
Tip:Ask another person to help with large panels or a heavy assembled box. Do not drag the box across rough ground, which can damage its base or joints.
Check: The panels and hinges are secure, the box does not rock, and the lid closes without catching or leaving an obvious gap.
Step 5: Anchor the box if the site requires it
Check the manual for anchor points and the recommended fixing method. Secure the box to a suitable deck, wall, or other approved support if wind could move it or local conditions require anchoring. Use fasteners compatible with the material and location, and avoid drilling where pipes, cables, or waterproof layers may be present.
Tip:If the instructions do not show an approved anchor method, contact the manufacturer before drilling or modifying the box.
Check: The box stays in position when gently pushed, and any anchors are attached at the specified points.
Step 6: Check protection before loading
Inspect the lid seal or overlap, corners, joints, and base for damage or openings. Test the lid again after anchoring. If the manufacturer permits, place a small piece of dry absorbent paper inside and close the box during a light shower; then check for dampness. Do not use a hose or heavy spray unless the product instructions allow that test.
Tip:A brief check cannot prove that a box will resist every storm. Keep vulnerable items in sealed inner bags or containers when extra protection is needed.
Check: The lid closes evenly, no parts are cracked or loose, and the test paper remains dry after the permitted weather check.
Step 7: Load items with airflow and access in mind
Store only clean, dry items. Put heavier items on the bottom, keep the load within the stated capacity, and leave space around vents or drainage features. Avoid packing items against the lid or hinge mechanism. Use breathable covers for cushions if recommended, and place small items in labeled containers so they can be removed without unpacking everything.
Tip:Do not store wet cushions or damp tools in a closed box; trapped moisture can cause mildew or corrosion.
Check: The lid closes fully without pressure, the box remains stable, and stored items are dry and easy to retrieve.
Step 8: Set a simple inspection routine
After heavy rain or wind, check that the box remains level, anchored, and closed. Open it periodically to inspect for condensation, mildew, pests, or water entry. Remove debris from the lid and base, dry the interior before returning items, and follow the manufacturer’s cleaning and maintenance schedule.
Tip:Inspect more often during the wet season or after moving the box.
Check: The box is clean and secure, and its contents show no signs of moisture or damage.
Common Mistakes to Avoid
- Choosing a box based only on its advertised capacity. — Compare interior dimensions with the actual items, and check the weight limit as well as volume.
- Placing the box on soft or waterlogged ground. — Use a firm, level, draining base and check the location after rain.
- Treating a weather-resistant box as airtight or fully waterproof. — Check the manufacturer’s exposure rating and use sealed inner containers for items that cannot get damp.
- Packing damp items tightly inside. — Dry contents first and leave airflow around vents and stored items.
Troubleshooting
Problem: The lid does not close evenly.
Solution: Check that the box sits level, panels are assembled in the correct order, and hinges are aligned. Remove anything pressing against the lid; adjust fasteners as the instructions allow.
Problem: Water appears inside after rain.
Solution: Dry the contents and interior. Clear debris from the lid edge, inspect the seal and joints, and check whether the box is exposed beyond its rated conditions. Move it under shelter or contact the manufacturer if damage or a fit problem remains.
Problem: The box rocks or shifts in wind.
Solution: Move it to a firm, level base and use the approved anchoring points if the manufacturer permits. Do not add improvised anchors that could crack the box.
Problem: A musty smell or mildew develops.
Solution: Remove and dry the contents, clean the box using the recommended method, and let it air out before reloading. Store only dry items and keep any designed vents clear.
What Success Looks Like
The box fits its location, stands securely on a level and draining base, opens and closes smoothly, and has no visible damage or obstructed vents. Suitable contents fit without forcing the lid, remain dry during ordinary exposure within the product’s stated rating, and show no mildew or water damage during routine inspections.
Next Steps
Keep the assembly and care instructions where you can find them. Check the box after storms and at the start of each wet season, clean away debris, and tighten or replace hardware only as the manufacturer directs. Reassess the contents if you add heavier items or the box’s location becomes more exposed. Move items indoors if the box is damaged, flooding is expected, or conditions exceed its stated rating.
Frequently Asked Questions
Are outdoor storage boxes waterproof?
Some resist rain well, but many are not fully waterproof or airtight. Check the manufacturer’s rating and keep highly moisture-sensitive items in sealed containers or indoors.
Can I put an outdoor storage box directly on grass?
It is better to use a firm, level base. Grass and soil can stay wet, allow the box to settle, and make the lid misalign.
Should I put a liner inside the box?
Use a liner only if the manufacturer allows it. An impermeable liner can trap condensation; breathable covers or sealed containers for individual items may work better.
What should I do if the box gets condensation inside?
Remove and dry the contents, air out the box, and check that vents are clear. Avoid storing damp items and inspect periodically, especially in cool, humid weather.