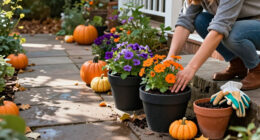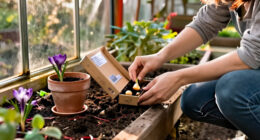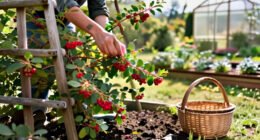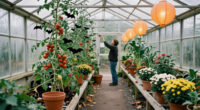
Decorate a greenhouse for Halloween with a coordinated set of removable decorations while keeping plants, ventilation, and walkways protected. This guide is for greenhouse owners and gardeners with little or no decorating experience. Allow about 1-2 hours, depending on the greenhouse size and how many decorations you install. You will plan the layout, choose suitable materials, hang decorations securely, and check that the space remains safe and functional.

Get garden gear delivered free with Prime
- Fast, free delivery on millions of items
- Prime Video, Amazon Music and more included
- Member-only deals all year

Colingmill Halloween Stained Glass Cute Ghost Plant Greenhouse Suncatcher
- ✔ Material: Glass
- ✔ Color: Colorful
- ✔ Size: 12 × 12 cm (4.72 × 4.72 in)

Cinnvoice Halloween Plant Stakes, 12-Piece Set
- ✔ Brand: Cinnvoice
- ✔ Quantity: 12 pieces
- ✔ Sizes: 6 at 4.72 in and 6 at 6.3 in

7-Piece Glow-in-the-Dark Octopus Tentacle Plant Stakes
- ✔ Brand: KH866
- ✔ Material: Resin and plastic
- ✔ Quantity: 7 pieces
Difficulty: Beginner | Time: 1-2 hours
What You’ll Need
Tools & Materials:
- Tape measure
- Soft cloth
- Garden gloves
- Step stool or stable ladder, if needed
- Plant-safe, removable clips or hooks compatible with your greenhouse frame
- Battery-powered LED lights, if using lights
Knowledge:
- Basic ability to identify greenhouse vents, doors, and walkways
- Ability to recognize delicate plants that should not be touched or shaded
Set aside 1-2 hours and check the local forecast before decorating. Choose lightweight decorations rated for the conditions where they will hang. Greenhouses can become hot and humid, and some frames or glazing materials can be damaged by adhesives, tape, sharp hooks, or heavy loads. Check the greenhouse manufacturer’s guidance before attaching anything to the structure. Keep decorations away from heating equipment, electrical outlets, water, and moving vents.
Colingmill Halloween Stained Glass Cute Ghost Plant Greenhouse Suncatcher
The Colingmill suncatcher makes the strongest direct connection between Halloween and greenhouse décor: its cute ghost greenhouse design places the seasonal character in a plant-growing setting, while the colorful glass is intended to cast vibrant shadows in sunlight. That gives it a different job from either stake set. Rather than adding decoration to soil or foliage, it turns a window into the display, which can make a small item feel more noticeable when the light is right.At 12 × 12 cm, it is compact and comes with a hanging chain for straightforward window placement. Compared with Cinnvoice’s 12 pieces, it covers less space and decorates just one spot; compared with the tentacles, it relies on daylight rather than a glow effect. We would choose it for a bright greenhouse window where the glass can be positioned securely. The main compromises are its fragile material, limited visibility in dim conditions, and the fact that colored-glass effects depend on available sunlight.
Pros:
- Colorful glass is designed to create vibrant light and shadow in sunlight.
- Ghost-and-greenhouse artwork fits the theme more specifically than generic Halloween stakes.
- Included chain allows hanging without a separate mounting accessory.
- Lightweight, compact format suits most windows.
Cons:
- Glass can break if mishandled or placed where it may be bumped.
- Small size and reliance on sunlight limit impact in dim greenhouse areas.
- Screen-rendered colors may not precisely match the item.
Best for: Greenhouse owners with a bright window who want one distinctive Halloween focal point and colored light effects.
Not ideal for: Anyone seeking broad coverage across several pots, a decoration for a dark corner, or a piece that can take knocks.
Bottom line: For a sunny greenhouse window, this is the most theme-specific choice, provided we can hang its fragile glass safely.
“For a sunny greenhouse window, this is the most theme-specific choice, provided we can hang its fragile glass safely.”
Cinnvoice Halloween Plant Stakes, 12-Piece Set
Where the Colingmill piece focuses attention on one window, the Cinnvoice set spreads a black-and-white striped Halloween look across multiple potted plants and vases. Its 12 ornaments come in two lengths, with six pieces around 4.72 inches and six around 6.3 inches. That size variation helps us create a little height and rhythm between containers instead of repeating identical accents at one level.The polymer-clay stakes are designed to insert directly into pots, so there is no need to hang anything or add a separate mount. This makes them the more practical choice for a greenhouse with many small displays, and the stated indoor/outdoor suitability offers placement flexibility. In return, we give up the suncatcher’s colorful light effect and the tentacles’ stated glow-in-the-dark feature. Their seasonal graphic is also narrowly Halloween-themed, and the pieces may look undersized in big pots or among large foliage. We would use them to coordinate a collection of modest containers, not as stand-alone décor for a spacious greenhouse.
Pros:
- Twelve pieces provide broader pot coverage than either single-location approach.
- Two stake lengths allow some variation in height across a display.
- Insert-in-pot installation is simple and does not require hanging hardware.
- Stated for indoor and outdoor displays.
Cons:
- Small ornaments may be hard to see in large pots or dense foliage.
- The striped Halloween design has less use outside the season.
- Does not provide the light effects of the glass suncatcher or glow feature of the tentacles.
Best for: Buyers who want to dress several small or medium pots and prefer a coordinated, easy-to-place stake set.
Not ideal for: Anyone decorating one bright window, seeking a glowing nighttime effect, or filling oversized containers with large-scale ornaments.
Bottom line: For coordinated Halloween accents across multiple pots, this set offers the best coverage, though its small pieces are not large-display focal points.
“For coordinated Halloween accents across multiple pots, this set offers the best coverage, though its small pieces are not large-display focal points.”
7-Piece Glow-in-the-Dark Octopus Tentacle Plant Stakes
The octopus tentacles are the lineup’s most playful choice: seven small, dark tentacle stakes bring an unexpected creature feature to pots, hanging baskets, or Halloween displays, with glow-in-the-dark suction cups intended to add interest after dark. Their resin-and-plastic construction is described as weather-resistant, giving them more flexibility for indoor or outdoor placement than the glass suncatcher, which needs a protected hanging spot.These stakes arrive ready to insert, so they are easier to deploy than a window decoration when we want to decorate foliage directly. Compared with Cinnvoice, they offer a more unusual silhouette and a nighttime angle, but fewer pieces and a mostly black palette make them less suited to building a bright, coordinated display across many containers. The listed tentacle lengths range from 2.5 to 5 inches, so scale matters: small pots are a natural fit, while larger planters may make the accents disappear. Choose them for a mischievous detail, not for a large greenhouse focal point.
Pros:
- Glow-in-the-dark suction cups offer a distinctive after-dark effect.
- Seven pieces can be distributed across several smaller plant displays.
- Weather-resistant resin and plastic are stated for indoor and outdoor use.
- No assembly is required before inserting them into soil.
Cons:
- Small tentacles may not suit larger pots or dense plant displays.
- Primarily black coloring gives less daytime color than the stained-glass option.
- The quirky octopus theme is more specialized than Cinnvoice’s striped ornaments.
Best for: Gardeners who want a quirky, ready-to-place Halloween detail for small pots or hanging baskets, especially in a nighttime display.
Not ideal for: Buyers who need large ornaments, a colorful daytime look, or enough pieces to decorate many pots consistently.
Bottom line: Pick these for a playful nighttime accent in compact planters, but choose Cinnvoice for wider coverage or Colingmill for a brighter visual effect.
“Pick these for a playful nighttime accent in compact planters, but choose Cinnvoice for wider coverage or Colingmill for a brighter visual effect.”
As an Amazon Associate we earn from qualifying purchases.
Before You Start
Decide whether the decorations will stay up while plants are growing, or whether you can temporarily clear the greenhouse for an event. Plant health and safe access take priority over the display. Do not use open flames, candles, fog machines, loose glitter, or decorations that shed fibers into the growing area. If the greenhouse is used for edible crops, keep decorations and any cleaning products away from harvestable parts. Take a quick photo of the empty space so you can compare the final layout and put items back where they belong.
Step-by-Step Instructions
Step 1: Clear and inspect the greenhouse
Move tools, empty pots, and other loose items out of the decorating area. Sweep or wipe the surfaces where you will work, then inspect the frame, glazing, vents, doors, and floor for damage or obstructions. Note which areas need to stay clear for plant care, watering, and emergency exit. Do not climb on benches, shelving, or greenhouse glazing; use a stable step stool or ladder on firm, level ground when you need extra reach.
Tip:Ask another person to steady a ladder or pass decorations if you need to work above shoulder height.
Check: The planned decorating area is clear, and you can identify the vents, exits, and paths that must remain unobstructed.
Step 2: Choose a simple Halloween theme
Pick two or three colors and one main motif, such as pumpkins and leaves, friendly ghosts, or a moonlit garden. Use that theme to guide your choices instead of filling every available space. For example, pair orange and warm white with a few artificial pumpkins, or use black silhouettes against a small area of clear glazing. Consider how the colors will look against your plants and greenhouse frame.
Tip:Keep the display restrained near seedlings and light-sensitive plants. Large or dark decorations can shade them.
Check: You have a short list of decorations that share a theme and fit the greenhouse without needing to cover every surface.
Step 3: Select lightweight, greenhouse-suitable materials
Gather lightweight, reusable decorations made from materials that can handle the expected dampness and temperature changes. Choose fabric or plastic pieces that will not drop parts, and use battery-powered LED lights if you want illumination. Test clips or hooks on an inconspicuous part of the frame first. Avoid adhesive products unless the greenhouse manufacturer approves them for the glazing and frame; adhesives can leave residue or damage some surfaces.
Tip:Check lights and battery housings for damage before use. Keep batteries and electrical components dry, and follow the product’s indoor or outdoor-use rating.
Check: Every chosen item is lightweight, intact, and compatible with the place and conditions where it will be used.
Step 4: Sketch the decoration layout
Mark the main display area on paper or in a phone photo. Place larger items around the perimeter, such as on a suitable shelf or near a door, and reserve open space around vents, doors, watering points, and plant-care routes. Plan any hanging decorations high enough to stay out of people’s faces but low enough to install without stretching or standing on unstable objects. Leave clear glazing and light paths where plants need them.
Tip:Make a small test arrangement on the floor or bench before attaching anything. This makes it easier to spot overcrowding and adjust the balance.
Check: Your layout shows where each item goes and leaves the greenhouse’s working areas, vents, and exits accessible.
Step 5: Attach decorations without damaging the structure
Install decorations using approved clips or hooks attached to suitable frame members, not to fragile glazing. Secure each piece so it cannot swing into plants, scrape a pane, or fall when a door opens. Do not drill, staple, or use nails on the greenhouse frame. Keep hanging cords short and tidy, and do not run them across walkways or wrap them around plants. If an attachment does not hold with gentle pressure, remove it and choose a safer method.
Tip:Do not hang heavy items from roof members unless the manufacturer confirms they can carry the load.
Check: Decorations stay in place when gently touched, and none presses against glazing, plants, doors, or vents.
Step 6: Add lighting only where it is safe
If you are adding lights, use battery-powered LED strings or another product explicitly suitable for the greenhouse conditions. Follow the manufacturer’s instructions for installation and use. Keep light strings away from water, heaters, sharp frame edges, and places where condensation collects. Secure the battery pack above the floor in a dry, accessible location, and switch the lights off when the greenhouse is unattended unless the product instructions allow otherwise.
Tip:Do not use candles, flame-shaped burners, or mains-powered lights that are not rated for damp conditions.
Check: Lights work as intended, remain clear of water and heat sources, and have no loose cable loops or exposed damaged parts.
Step 7: Check airflow, access, and plant conditions
Open and close every door and vent through its full range. Walk the paths as you would while watering or carrying a tray, and confirm that decorations do not snag clothing or tools. Check that plants still receive the light they need and that leaves are not touching fabric, cords, or plastic. Remove anything that blocks airflow, risks falling, or makes plant care harder.
Tip:Take a second look from inside and outside the greenhouse; a decoration that seems clear from one angle may hide a vent or path from another.
Check: Vents and doors operate freely, paths are open, and plants remain undisturbed and adequately lit.
Step 8: Secure the display and plan its removal
Give each attachment a gentle final check, collect packaging and scraps, and store spare clips and batteries together. Note the date you plan to take the decorations down, especially if they are temporary event items. After wind, heavy rain, or a sudden temperature change, inspect outdoor-facing decorations and remove anything loose or damp. When the display is no longer needed, take it down carefully and check the frame and glazing for marks.
Tip:Keep reusable pieces dry and clean before storing them so they are ready for next year.
Check: The display is tidy and stable, the greenhouse is usable, and you have a clear plan for checking and removing the decorations.
Common Mistakes to Avoid
- Using open flames or unsuitable electrical lights in a humid greenhouse. — Use battery-powered LED products suitable for the conditions, keep components dry, and exclude candles and flames.
Troubleshooting
Problem: Battery lights flicker or stop working.
Solution: Switch them off, dry the battery pack if the product instructions permit, and check the batteries, connections, and light string for damage. Replace damaged products; do not use them near water or condensation.
What Success Looks Like
The finished greenhouse has a recognizable Halloween theme, with decorations securely attached and no visible damage to the structure. Doors and vents open fully, walkways and watering points stay clear, and no decoration touches plants or blocks needed light. Any lights operate safely according to their instructions. You can move through the greenhouse and carry out routine plant care without snagging, obstruction, or risk of a falling item.
Next Steps
Check the display after the first day and after any rough weather or major temperature change. Remove damp, loose, faded, or damaged items promptly. At the end of the season, take decorations down, clean them according to their labels, and store reusable pieces in a dry container. Inspect the greenhouse for residue or damage, then return benches and tools to their usual positions. If any attachment has marked the frame or glazing, stop using that attachment and ask the greenhouse supplier for a compatible alternative.
Frequently Asked Questions
Can I hang decorations from greenhouse glazing?
Avoid hanging decorations from glazing. It may be fragile or unsuitable for carrying weight. Use manufacturer-approved clips on appropriate frame members, or place decorations on a stable shelf instead.
Are real pumpkins suitable for a greenhouse display?
Whole pumpkins can work as floor or bench decorations if they are stable and kept away from plant leaves and walkways. Check them regularly for soft spots, mold, or leaks, and remove them as soon as they begin to spoil.
What lights are safest to use?
Battery-powered LED lights are a practical choice when their instructions permit use in the greenhouse conditions. Keep the battery pack dry and away from heaters and standing water. Do not use candles or unapproved mains-powered lights.
How can I decorate without harming plants?
Keep decorations off leaves and stems, preserve airflow, and avoid shading plants that need direct light. Use clean, intact items that do not shed glitter, fibers, or small parts into growing areas.
When should I take the decorations down?
Remove event decorations after the event or Halloween, and take down any item sooner if it becomes loose, damp, damaged, or disruptive to plant care. Check the display after rough weather while it remains installed.
Halloween Picks
halloween
As an affiliate, we earn on qualifying purchases.